Creation Kit: Configuring your weapon + OMODS (Multiple ammunition types)
This article will show the correct way to make OMODs that change your weapons ammunition and the UI_Icon keyword associated with the custom icon files.
Table of Contents
You can click any image to enlarge it
Remarks
You do not have to change the UI_Icon keyword if you do not want to be natively supported by Ammo HUD, if thats something you dont care about then you can skip those parts but it would be really cool if you would do that little bit of extra work so I can directly support your mod without a patch.
Keywords
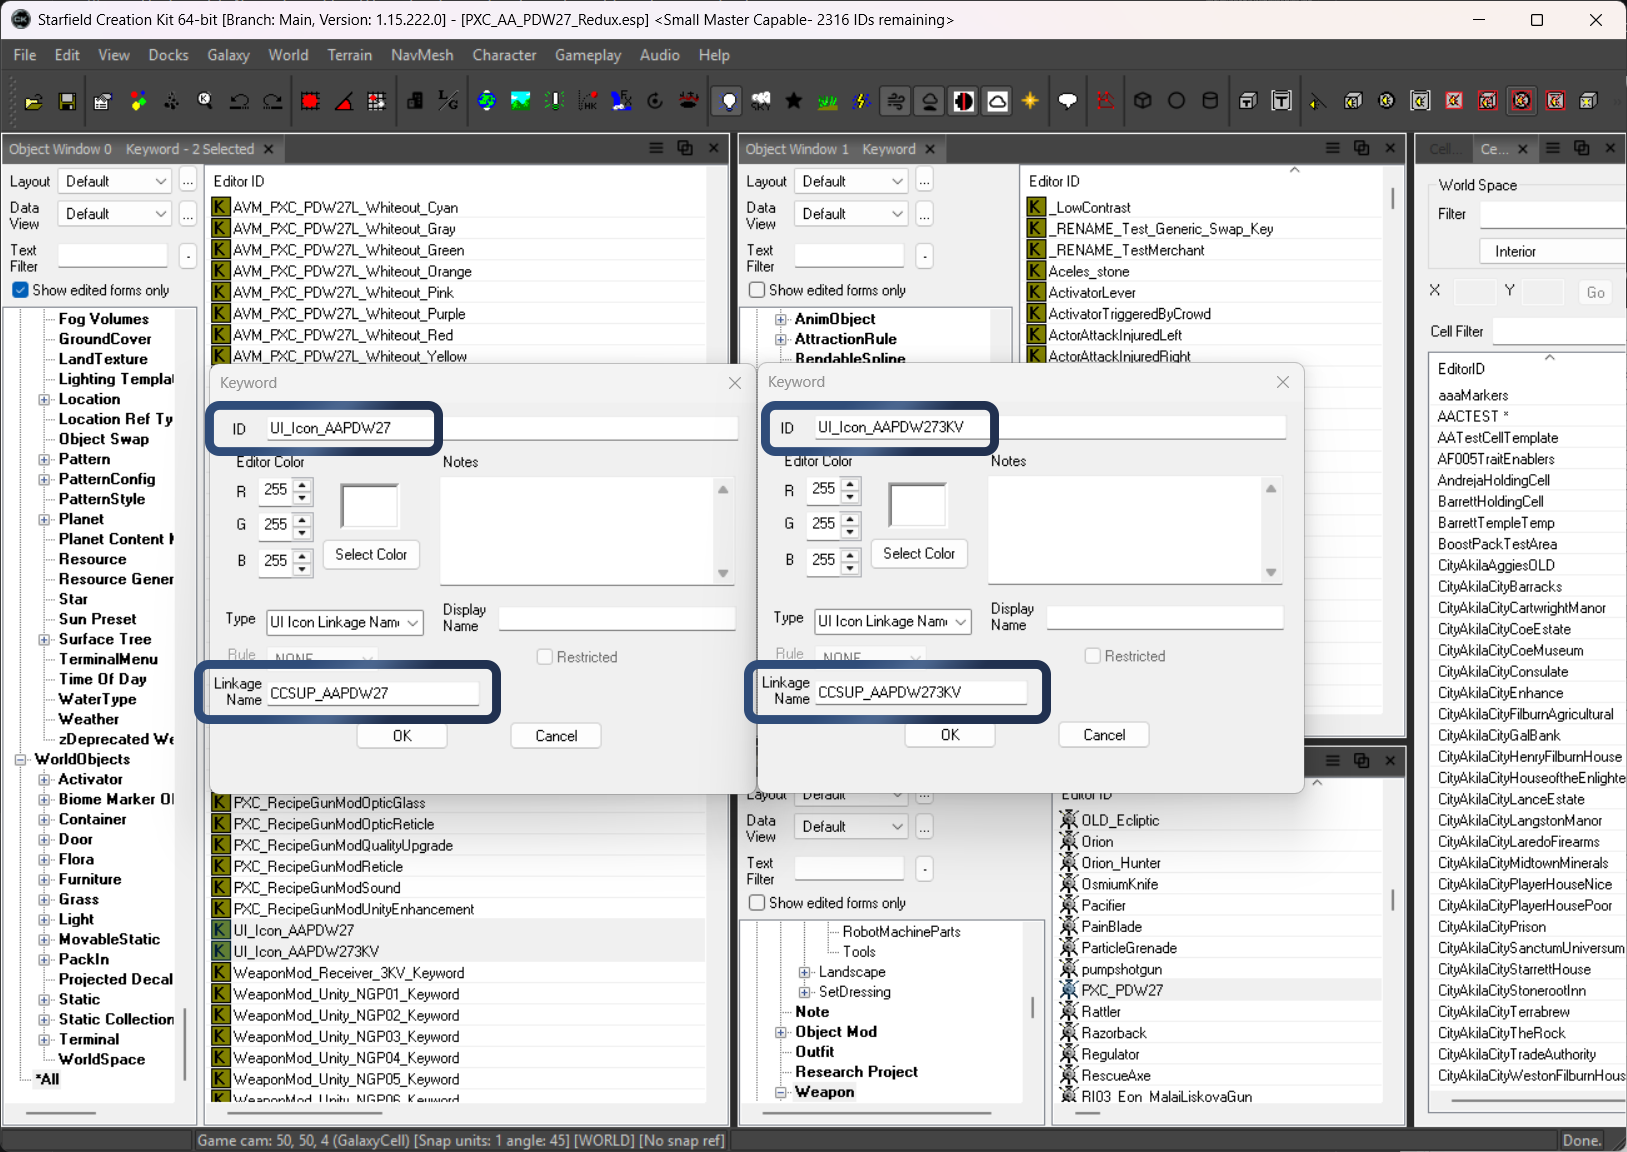
For this to work correctly you need to create multiple UI_ICON keywords based on the amount of ammunition changes you are providing. See this article for information on creating the keywords.
This example I will be using my Allied Armaments PDW-27 Redux mod as an example since it allows you to change from 1.5KV to 3KV lasers.
Here you will see that I have two keywords created, each with their own unique ID and Linkage Name.
Keywords
Attach Points
Make sure you are using an attach point keyword for what you are doing, I am not going to go over those as they are pretty self explainitory. The examples below show me using a custom one specific to ammo OMODs, they show as their own category on the weapon workbench
Make sure your AP keywords have a Display Name value, if they dont then they will not show in the weapon workbench
Object Mods (OMODs)
You will need to create a separate OMOD for each ammunition change you want to support. For this example there will be only two, but it will show the correct form setup which you can replicate for more if required.
Property Modifiers
This section outlines the specific propetty modifiers to set and their operation to use.
Operators
There are three operators that you can set for each property modifier
| Value | Description |
|---|---|
| ADD | Adds the selected modifier to the weapon |
| REM | Removes the selected modifier from the weapon |
| SET | Overrides the selected modifier value for the weapon |
You never want to use SET for keywords, this will cause all kinds of problems.
Changing Ammo
There are two types of modifiers which are important for changing ammunition
| Target | Description |
|---|---|
| poAmmo | This will change the actual ammo used by the weapon |
| pnNPCammoList | This is a Leveled List for ammo that is used by NPCs, this affects which ammo is also on their dead bodies |
It's best practice to include both, but you do not need to include poAmmo for your default ammo type as its already derrived by the weapon form.
You also only want to use the SET operator on these since you are overriding the defaults.
Default Ammo OMOD
This OMOD aligns with the default ammo set by the weapon form, this allows a user to go back to the default ammo. You can see that pnNPCammoList is being SET to LL_Ammo_Laser but poAmmo is omitted
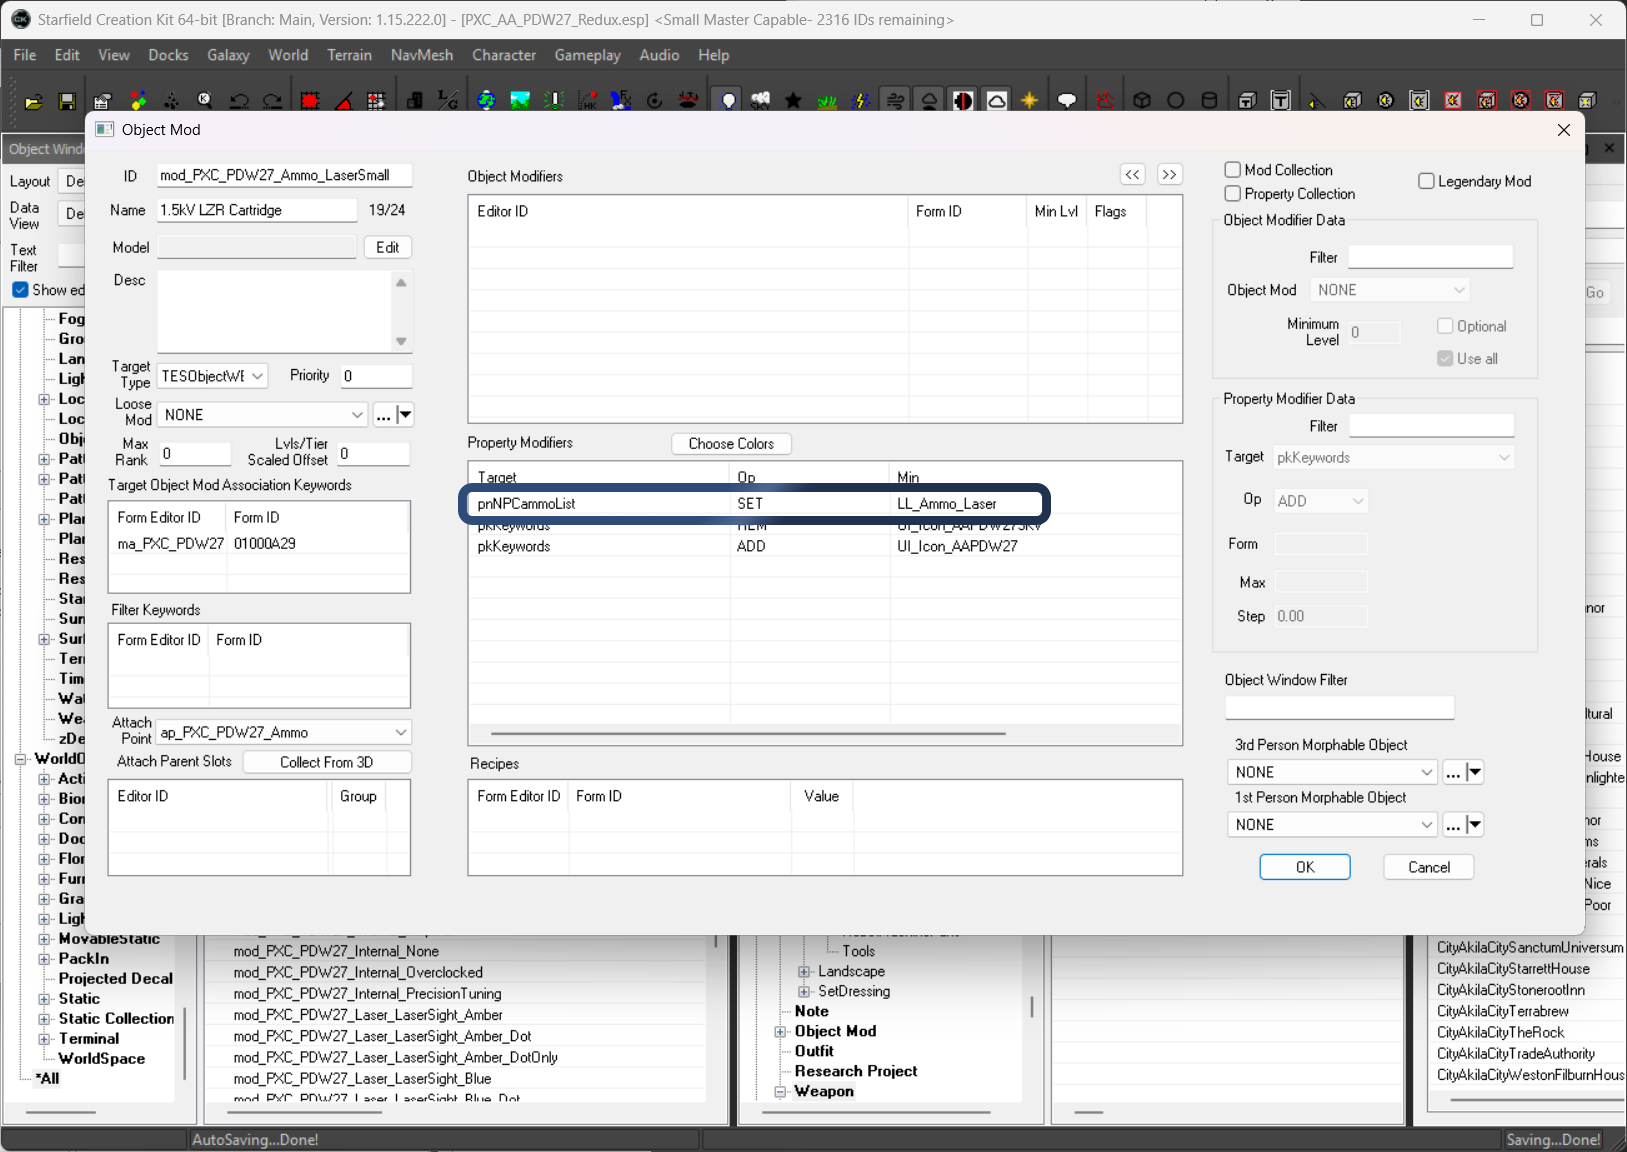
Default Ammo OMOD
Secondary Ammo OMOD
This OMOD aligns with the default ammo set by the weapon form, this allows a user to go back to the default ammo. You can see that pnNPCammoList is being SET to LL_Ammo_Laser and poAmmo is being SET to AmmoLaser

Secondary Ammo OMOD
Changing UI_Icon Keywords
This is just adding/removing the keyword with the same OMOD you are changing the ammo with.
The important thing to remember is that you need to REM each keyword that isnt the one you are using for this and Add just the one that corresponds with the ammo being changed.
Default Ammo and UI_Icon OMOD
This is showing that you need to ADD the default icon and REM the secondary icon keyword
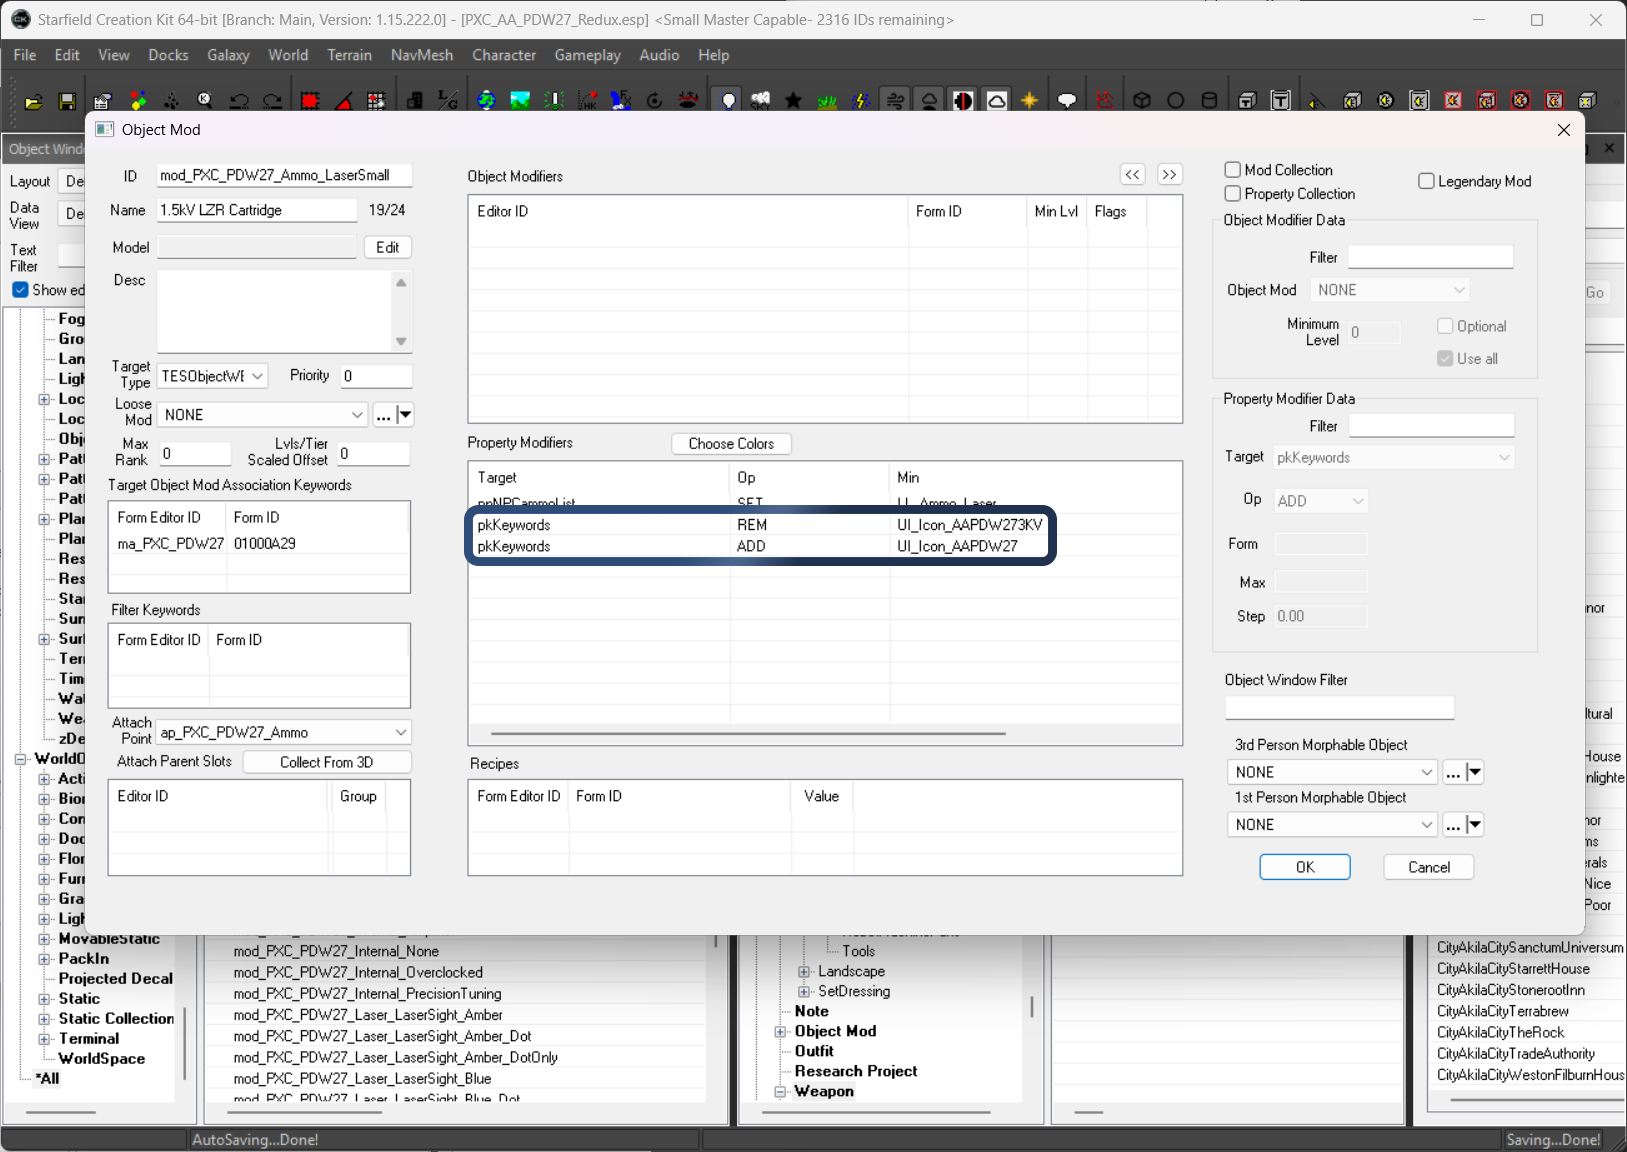
Default Ammo and UI_Icon OMOD
Secondary Ammo and UI_Icon OMOD
This is showing that you need to REM the default icon and ADD the secondary icon keyword
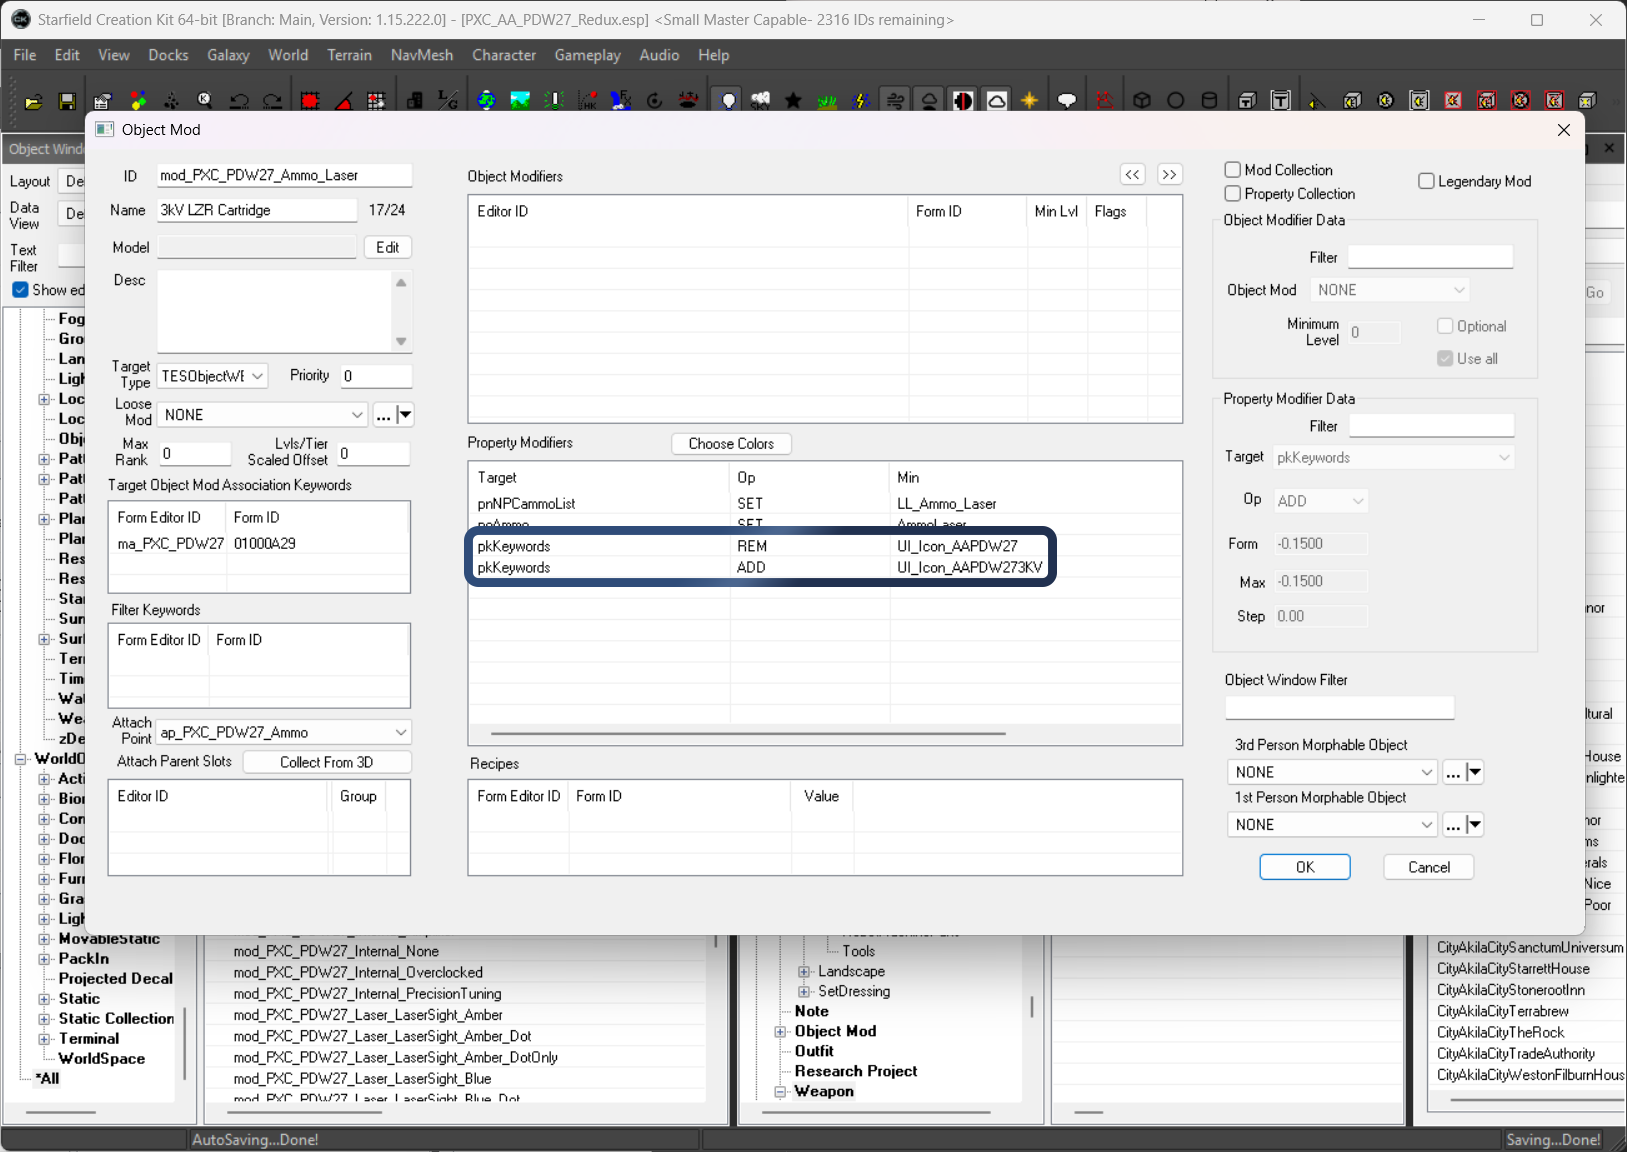
Secondary Ammo and UI_Icon OMOD
Mod Group OMOD
If you want your gun to spawn with either of your ammo/icon OMODs, instead of just a specific one each time, you can create a Mod Group OMOD and attach that to your weapon form. You can do level locking if you want, but if you use level 0 then it will be randomly selected. Since each OMOD uses the same attach point keyword it should only ever apply one.
OMOD Example
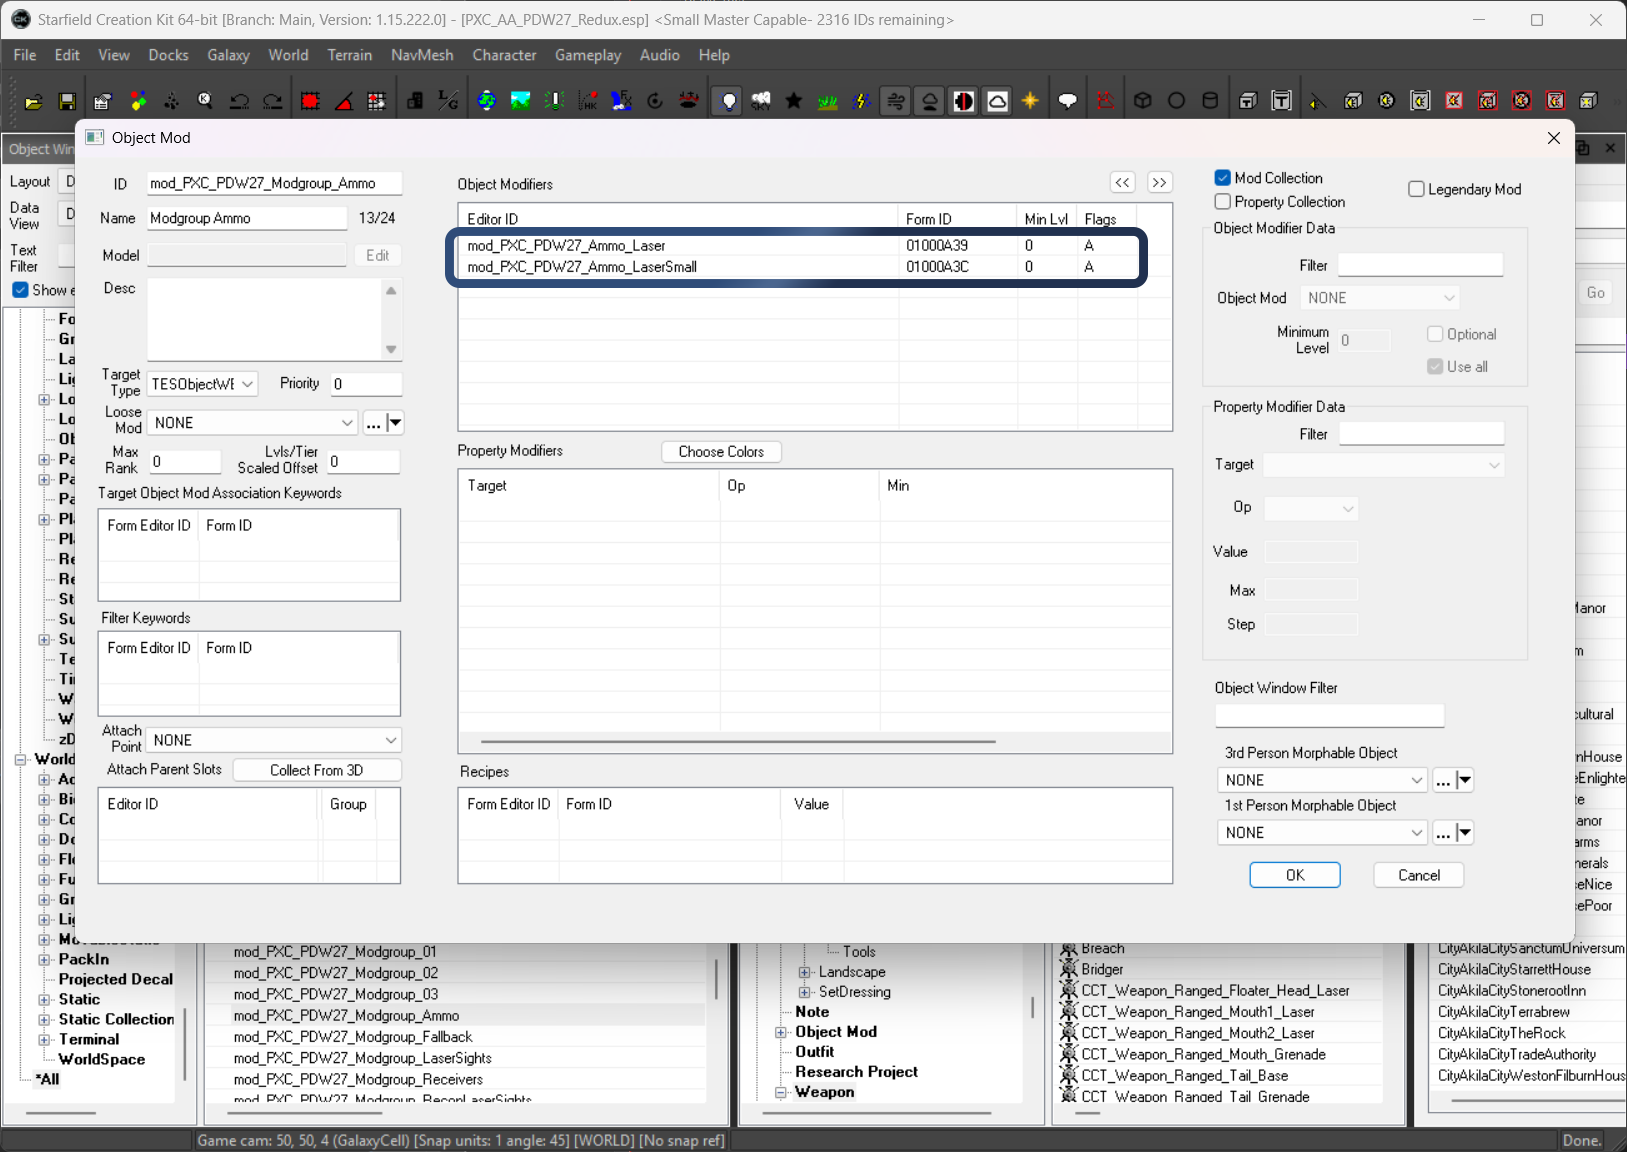
Mod Group OMOD
Constructable Objects (COBJs)
You will need to create a COBJ for each OMOD so the user has the ability to apply them in the weapons workbench. Just including screenshots for completeness, not going to go into details on how a COBJ works here.
Default Ammo/Icon COBJ
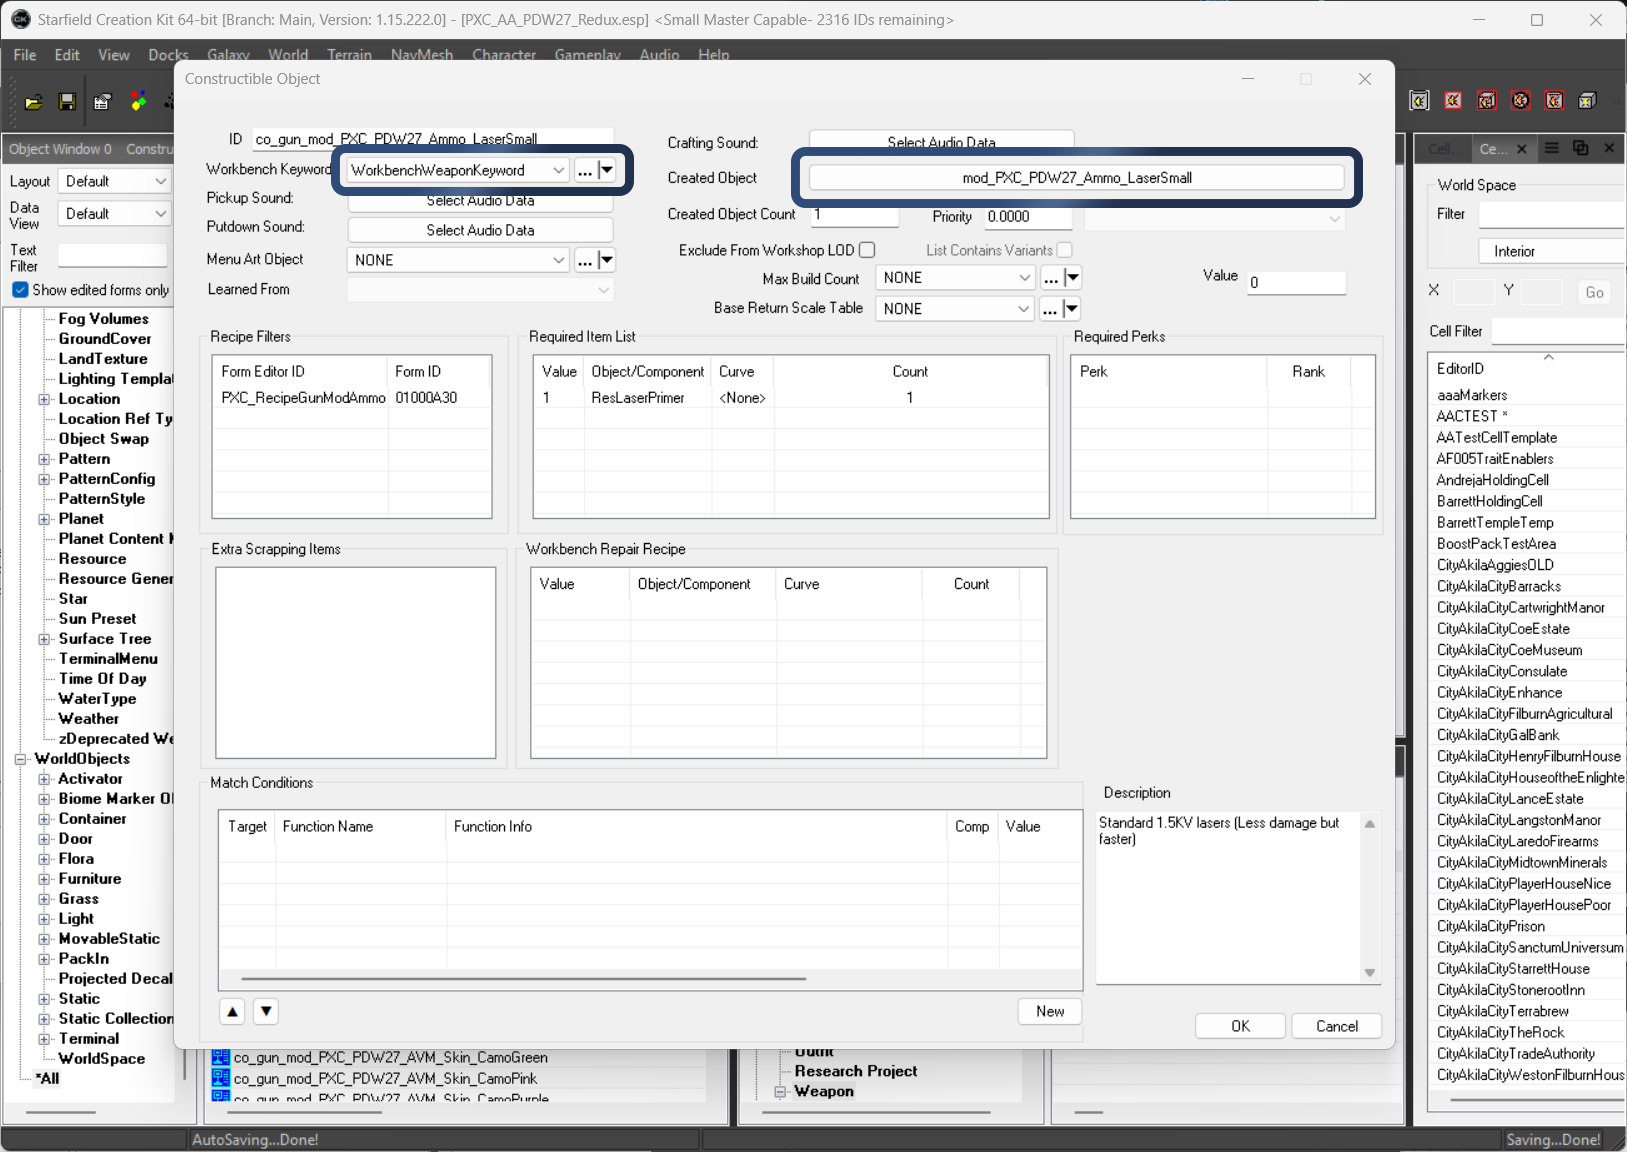
Default Ammo/Icon COBJ
Secondary Ammo/Icon COBJ
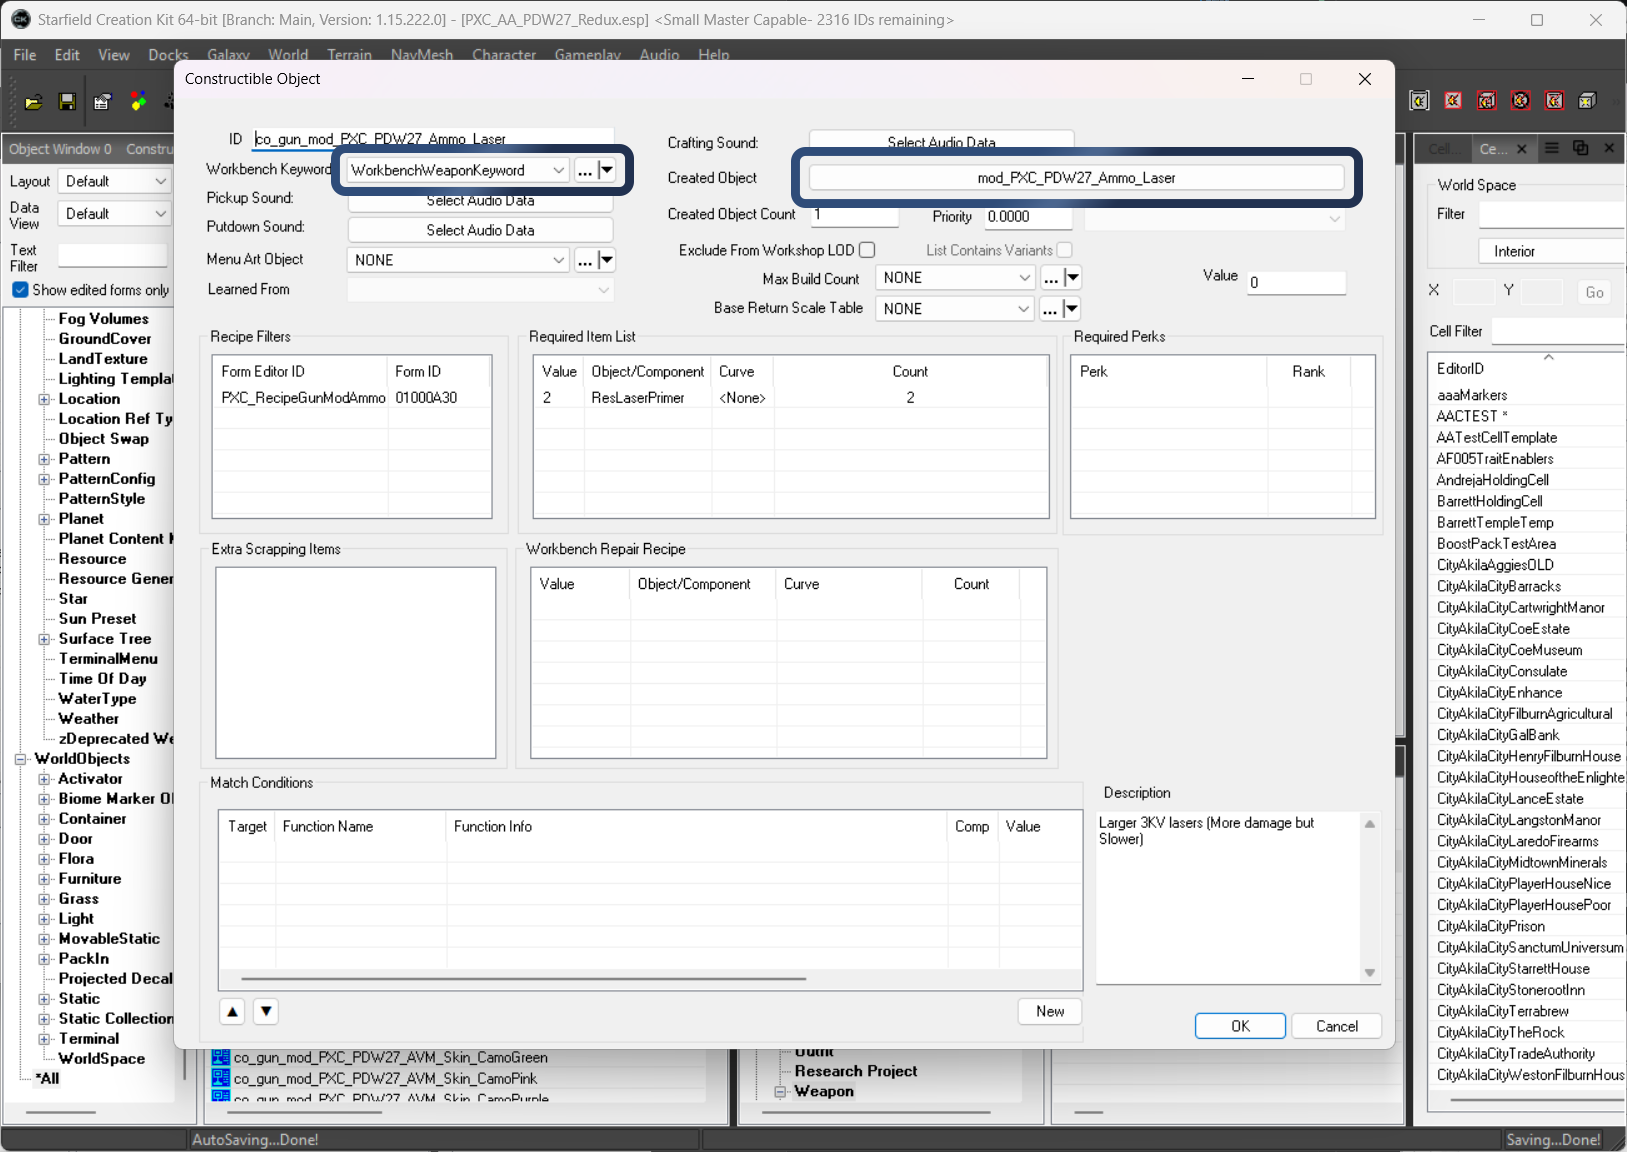
Secondary Ammo/Icon COBJ
Weapon Form Setup
This section will show how the weapon form should be configured.
Mod Group OMOD
Make sure to attach your mod group OMOD to the Object Mod section of your weapon form
For this you want to uncheck Optional and Use All
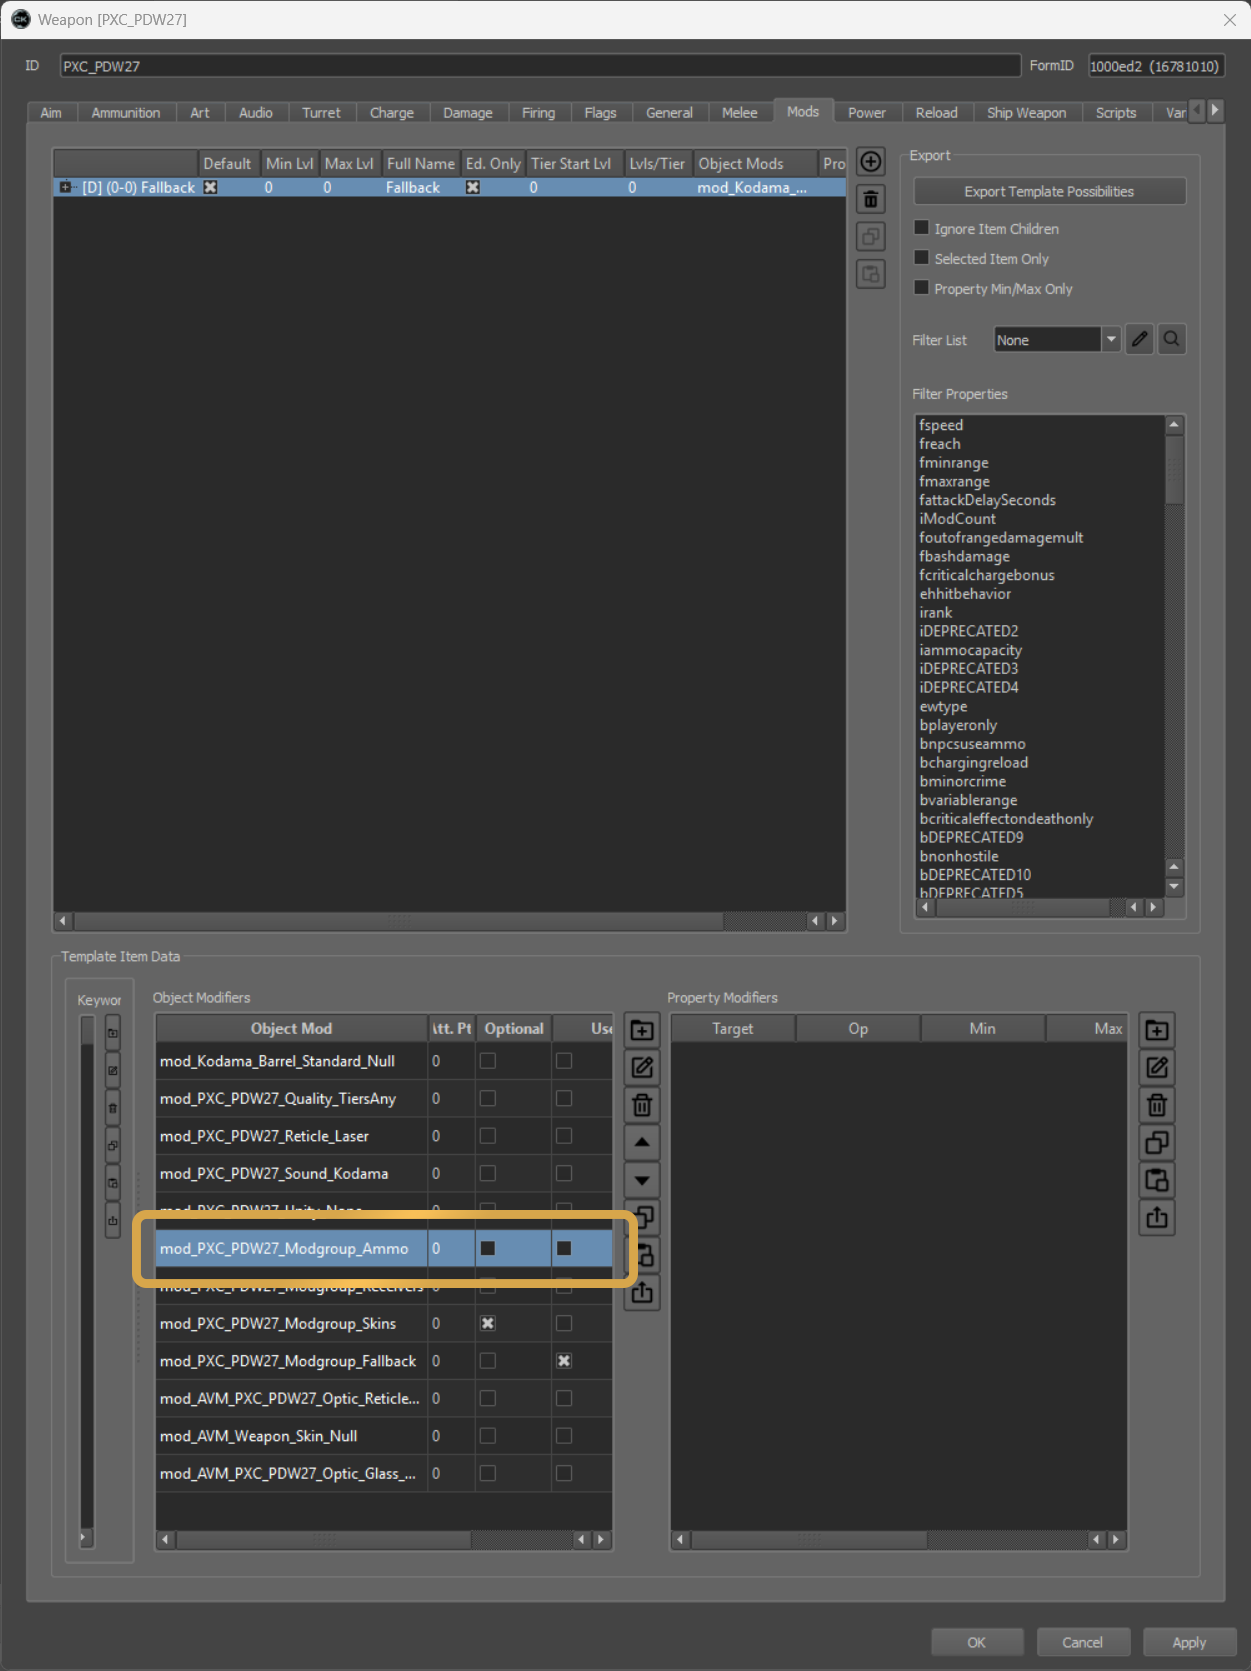
Mod Group OMOD - Weapon Form
UI_Icon Keyword
Here is a screenshot of the General tab of the weapon form where there is no UI_Icon assigned. Basically you are assinging it via the OMODs instead of the weapon form so it should not exist in the Keywords panel.
You MUST have no UI_ICON keyword on the weapon form for this to work, if you have one there it will override all OMOD applied ones
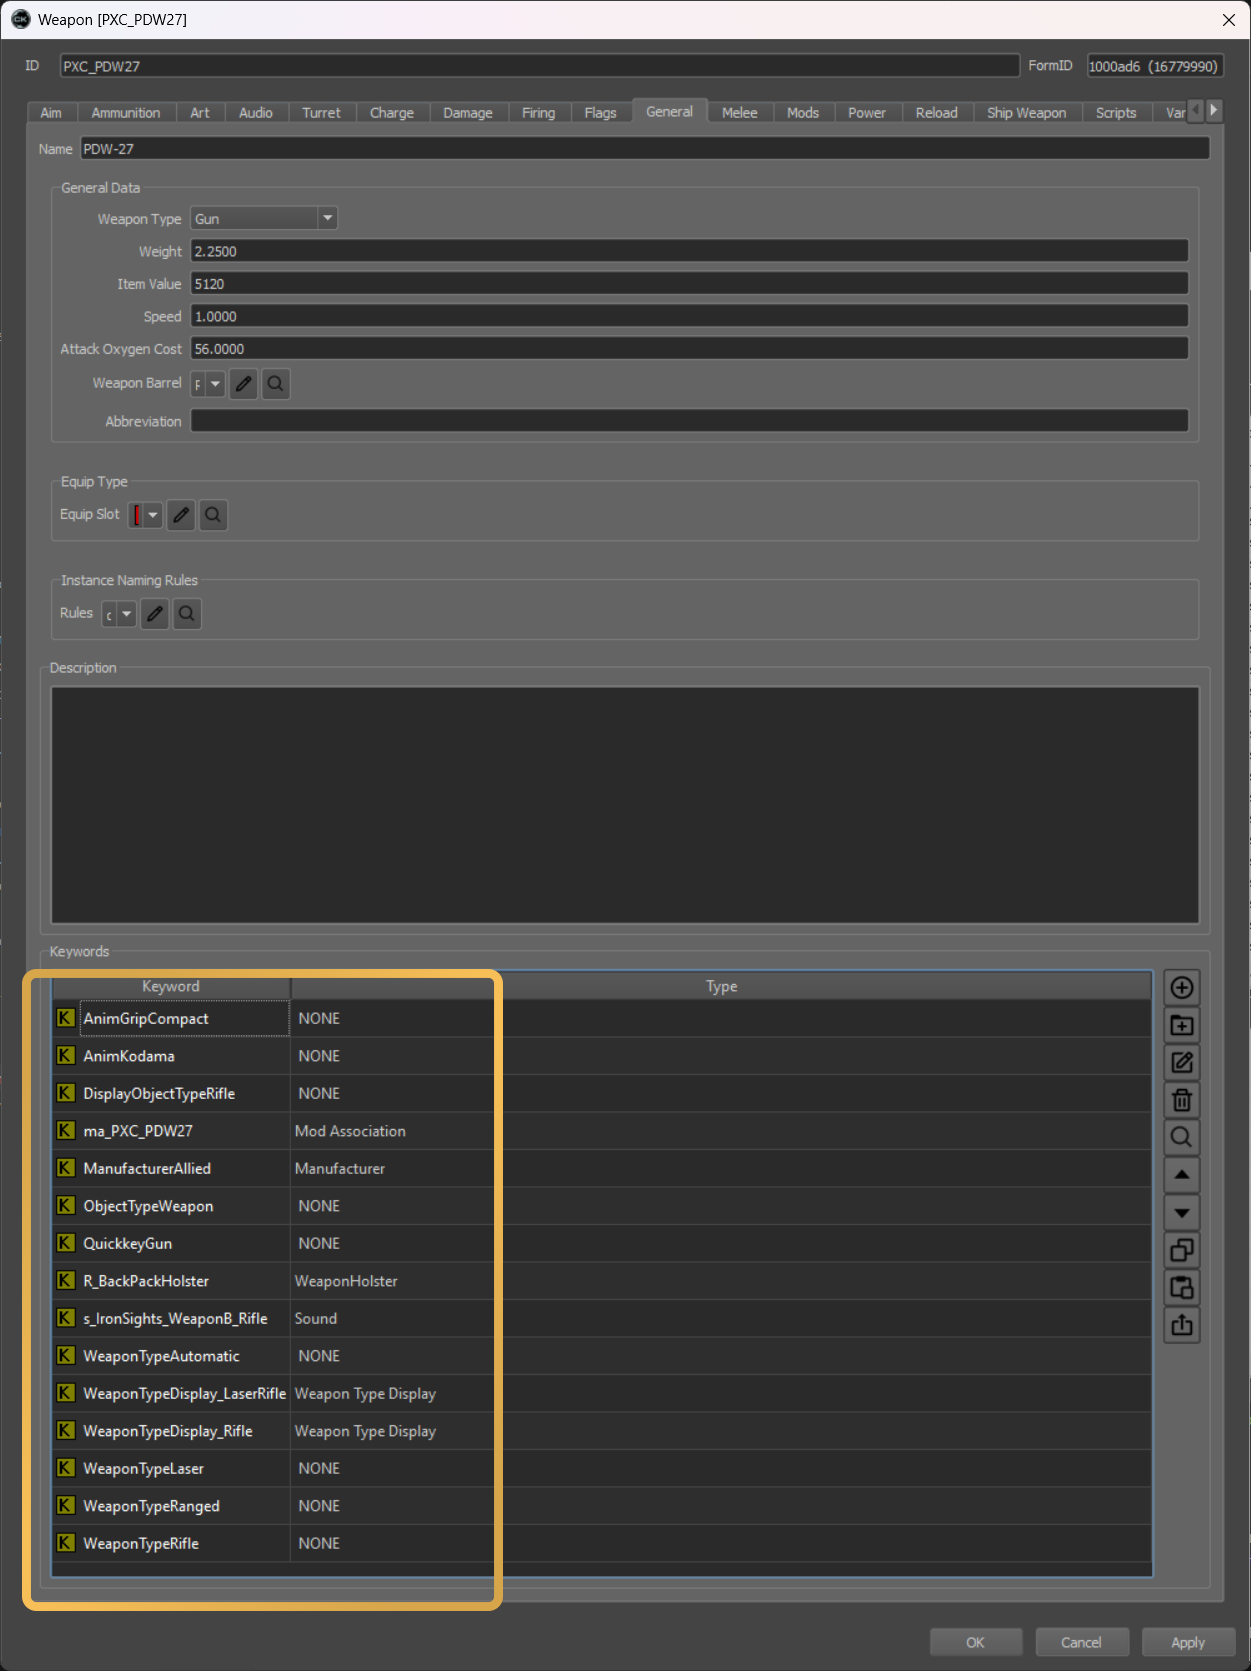
Weapon Form Doesnt Have UI_Icon Keyword