JPEXS FFDec: Manually creating your icon file using the template
Table of Contents
You can click any image to enlarge it
Getting Started
This tutorial will show you how to use the Custom Weapon Icon Template (CCSUP_CustomWeaponTemplate.swf) and JPEXS Free Flash Decompiler to load your weapon icon.
You can alternativel download my custom app which will do all the hardwork for you - More information here
This tutorial is for v2.0.0 of the weapon template, if you are looking for v1.0.0 information, that can be found here
If you need assistance feel free to reach out to me using any of my social contacts on the home page
Prequisites
You will need to have the following completed before you can continue:
- Install JPEXS Free Flash Decompiler
- Follow the Creation Kit: Getting a good silhouette tutorial
- Setup your mod correctly - The following tutorials have more information:
Opening the Custom Weapon Template in JPEXS FFDec
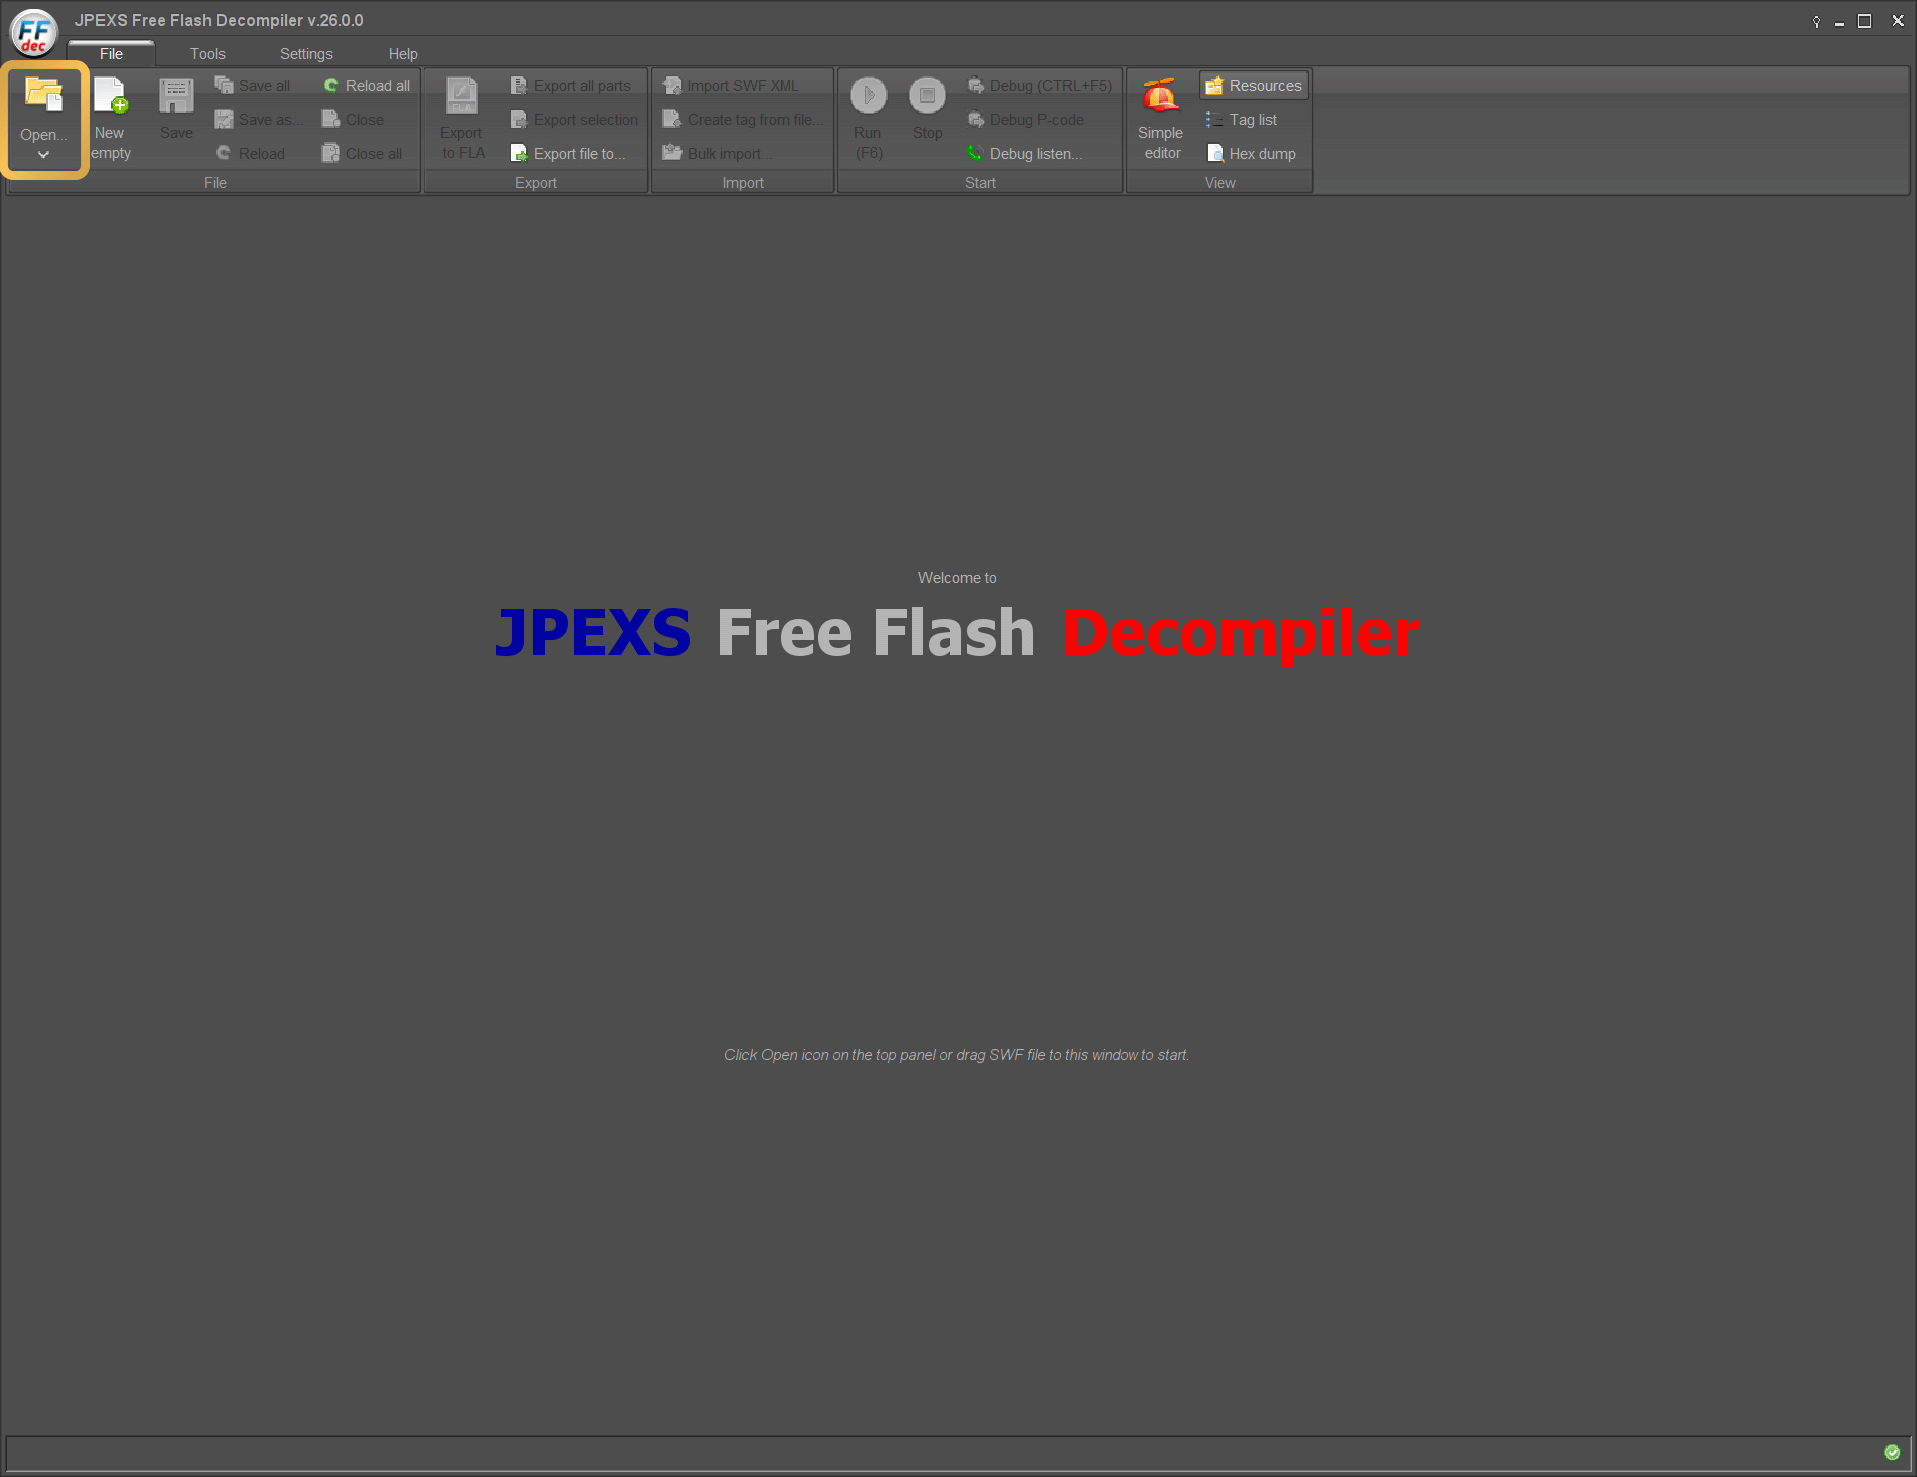
Open JPEXS normally and then click Open on the top left.
If you want to change the theme for JPEXS you can go to Settings > Advanced Settings on the Interface tab scroll down to the bottom and change the User Interface Skin. I am using the Graphite skin here.
Open the template in JPEXS FFDec
In the open window navigate to where you have saved the CCSUP_CustomWeaponTemplate.swf template file, highlight it and click Open
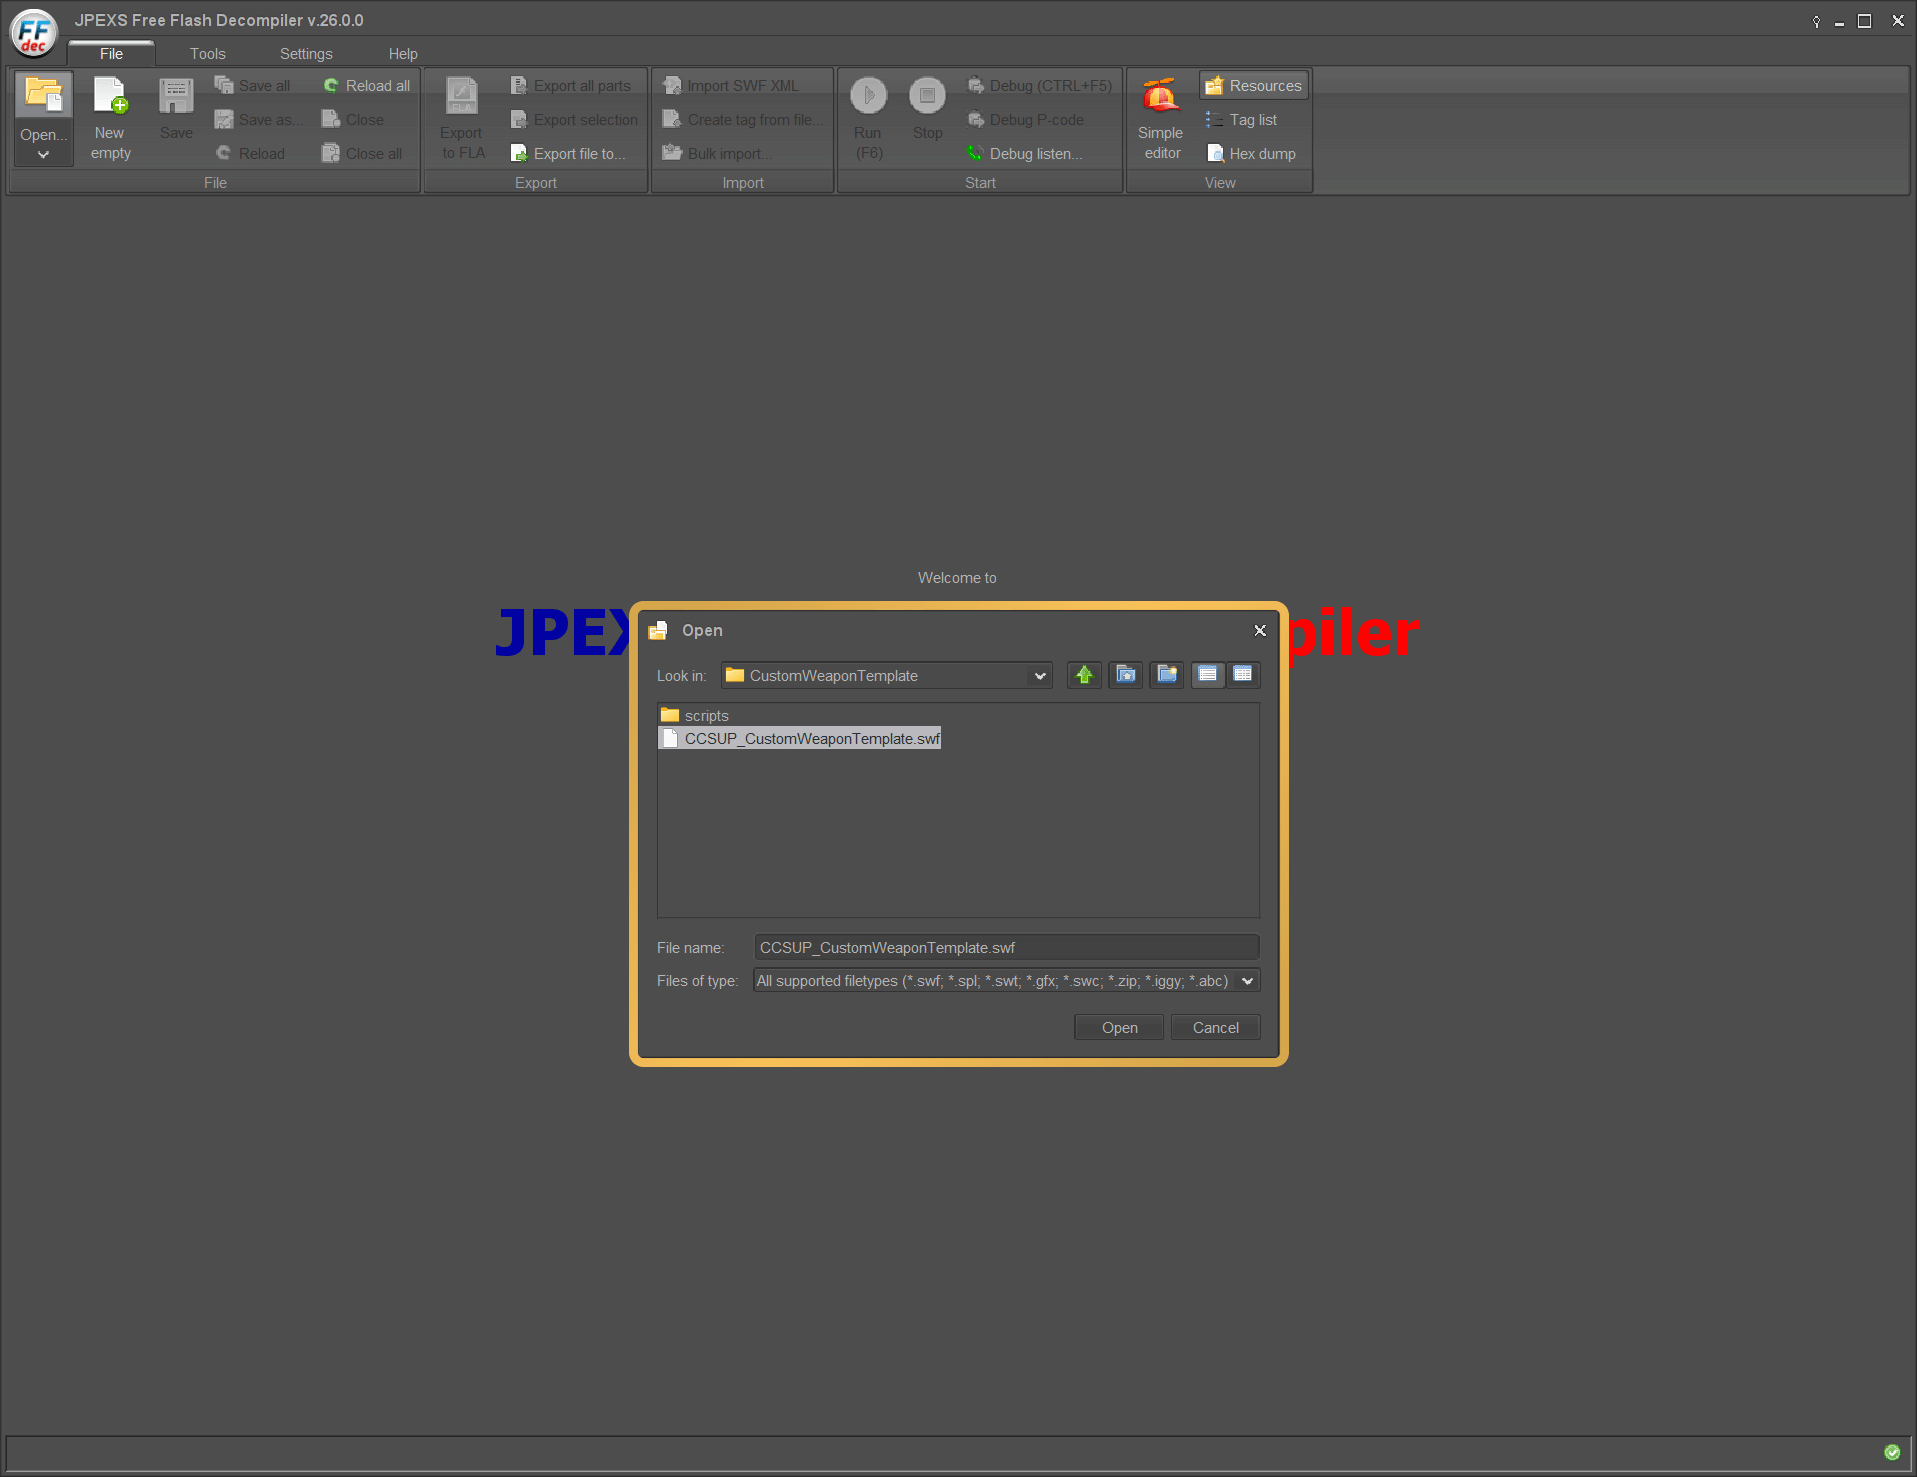
Choose CCSUP_CustomWeaponTemplate.swf
You will see that there are some basic instructions embedded in the file
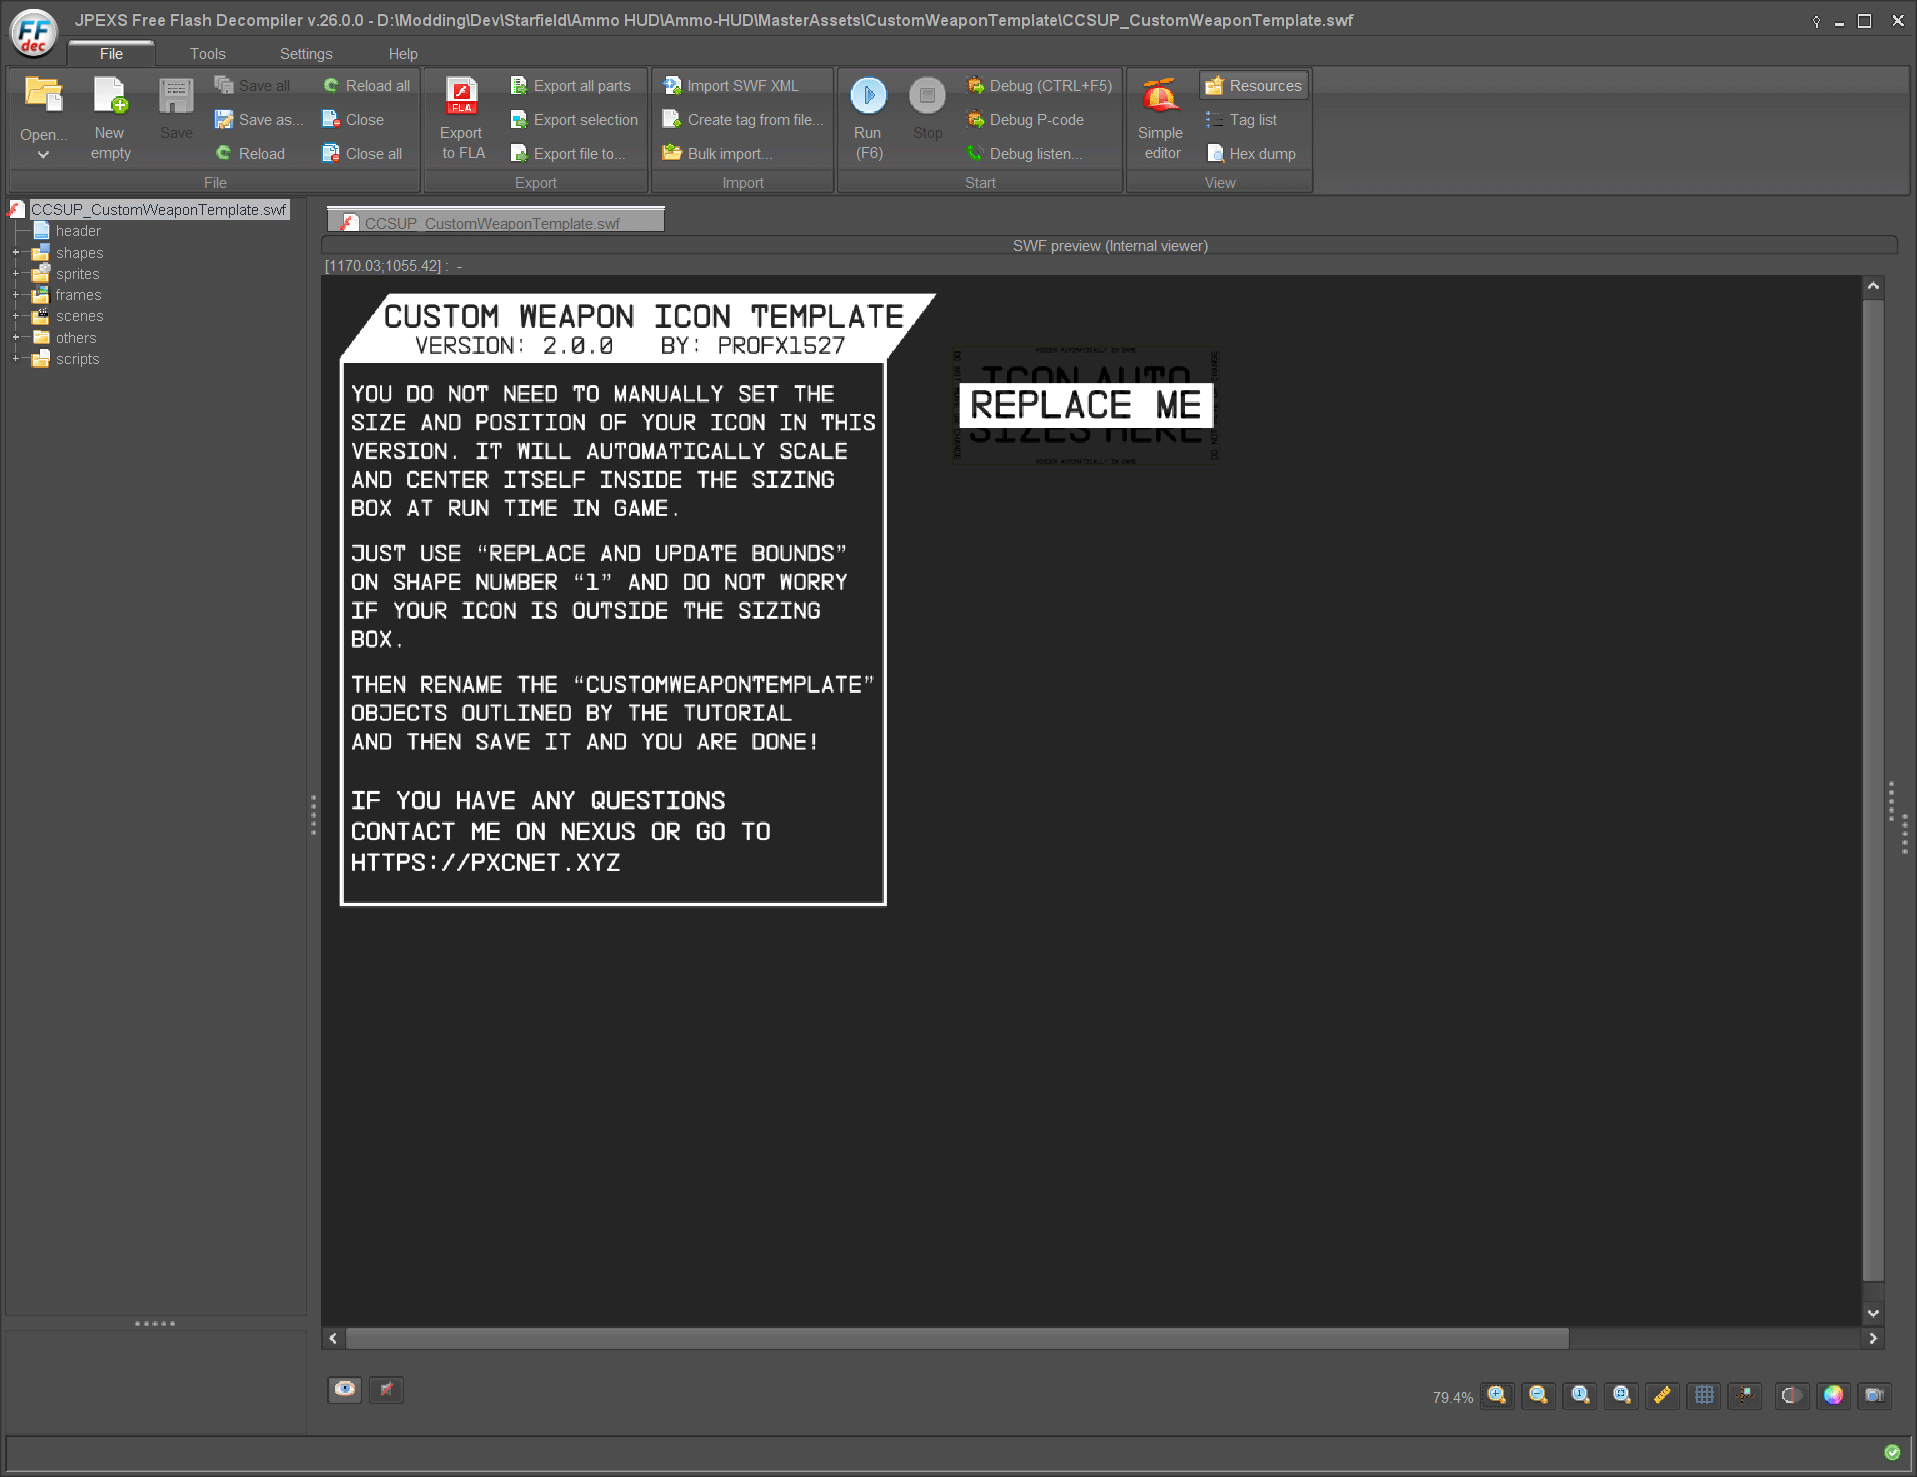
CCSUP_CustomWeaponTemplate.swf
With version 2.0.0 of the template, your icon will get automatically sized and positioned correctly at run-time in game
Importing your SVG
Now that you have the template open, on the left side select shapes and then double click on DefineShape (1) (the one that shows an image that states REPLACE ME)
The other shapes will not show up in game at all, but they are important to stay as they are, please do not change or move either of them
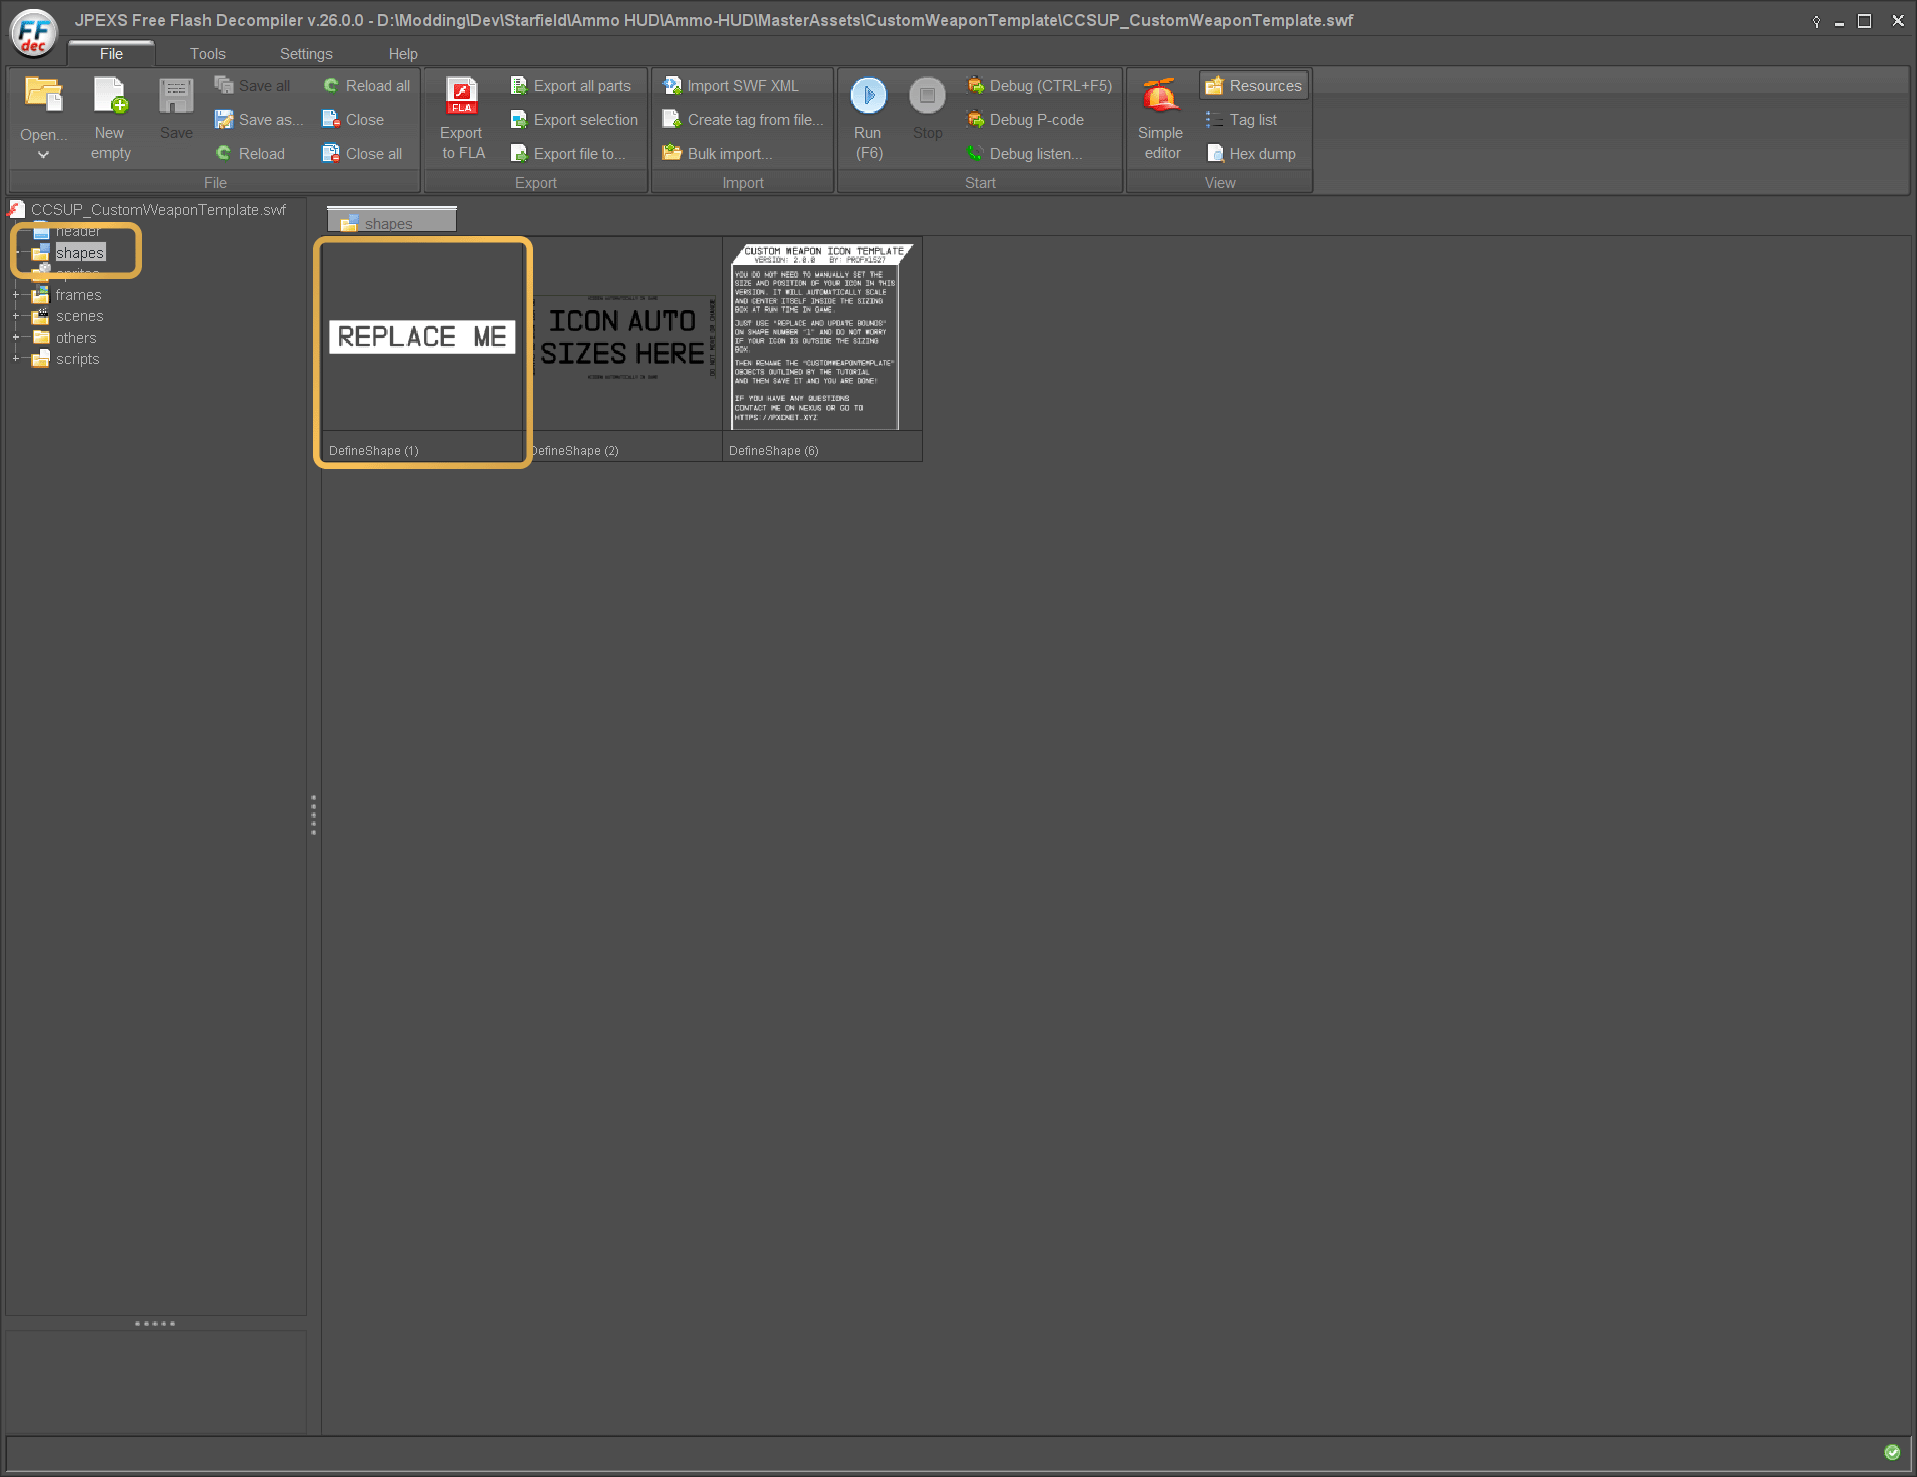
Open the REPLACE ME shape
Replace and Update Bounds
Click the button that says Replace - update bounds on the bottom right
Clicking the Replace button that does not say update bounds will distort your icon, please avoid clicking that one

Replace - update bounds
Choose your SVG file
Navigate to where you have saved your SVG icon file, select it and click Open
You may see a warning popup saying Note all SVG features are supported, just click OK on it
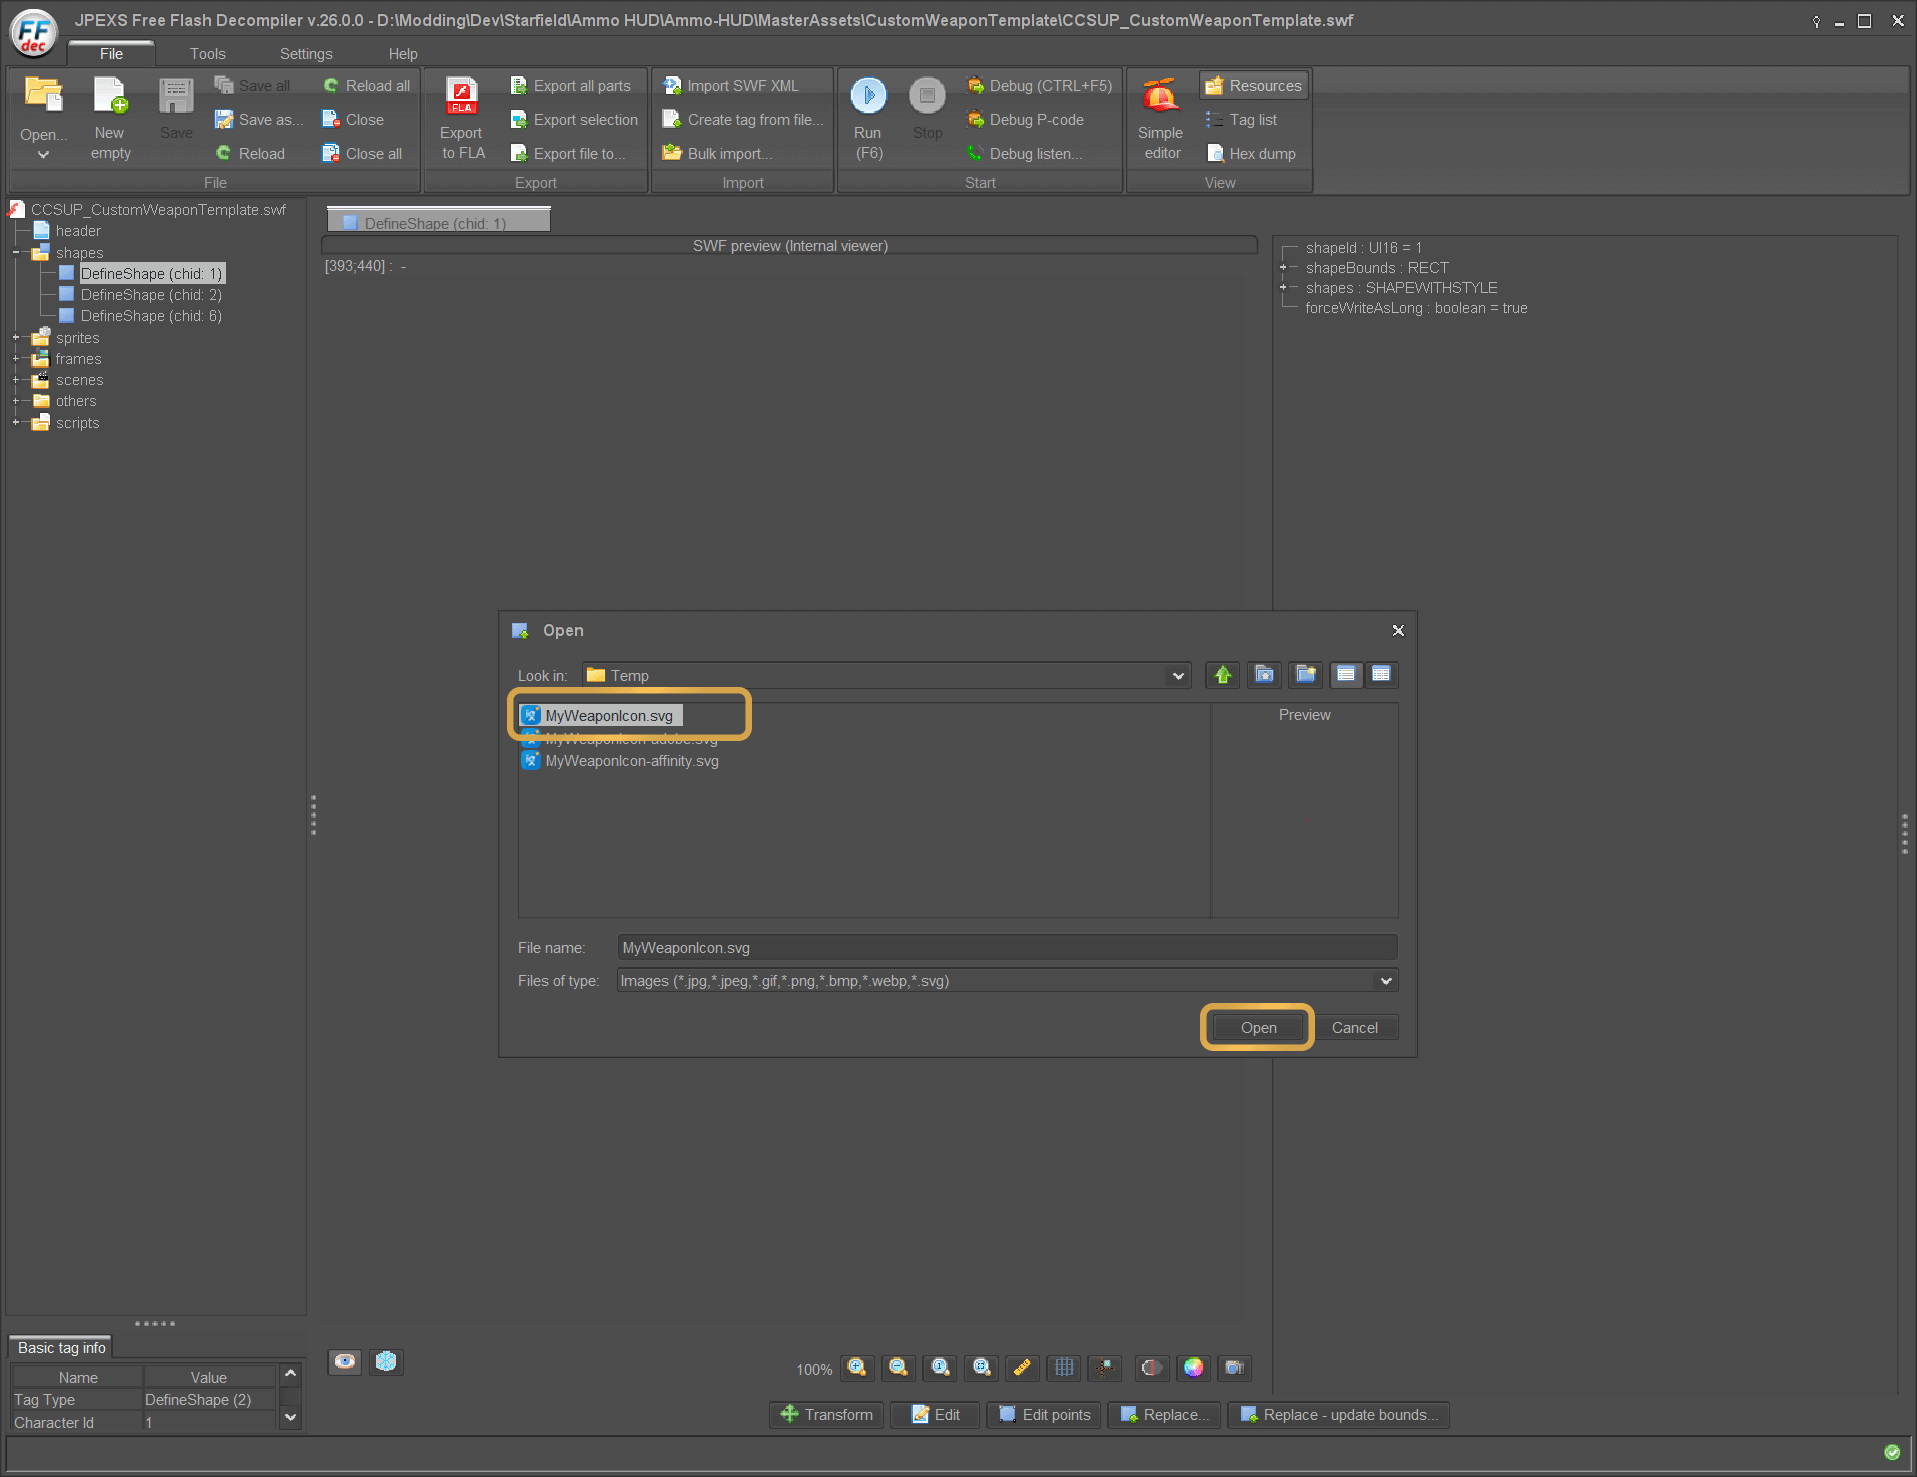
Choose your SVG file
Imported Icon
Here you can see the SVG icon has been imported correctly.
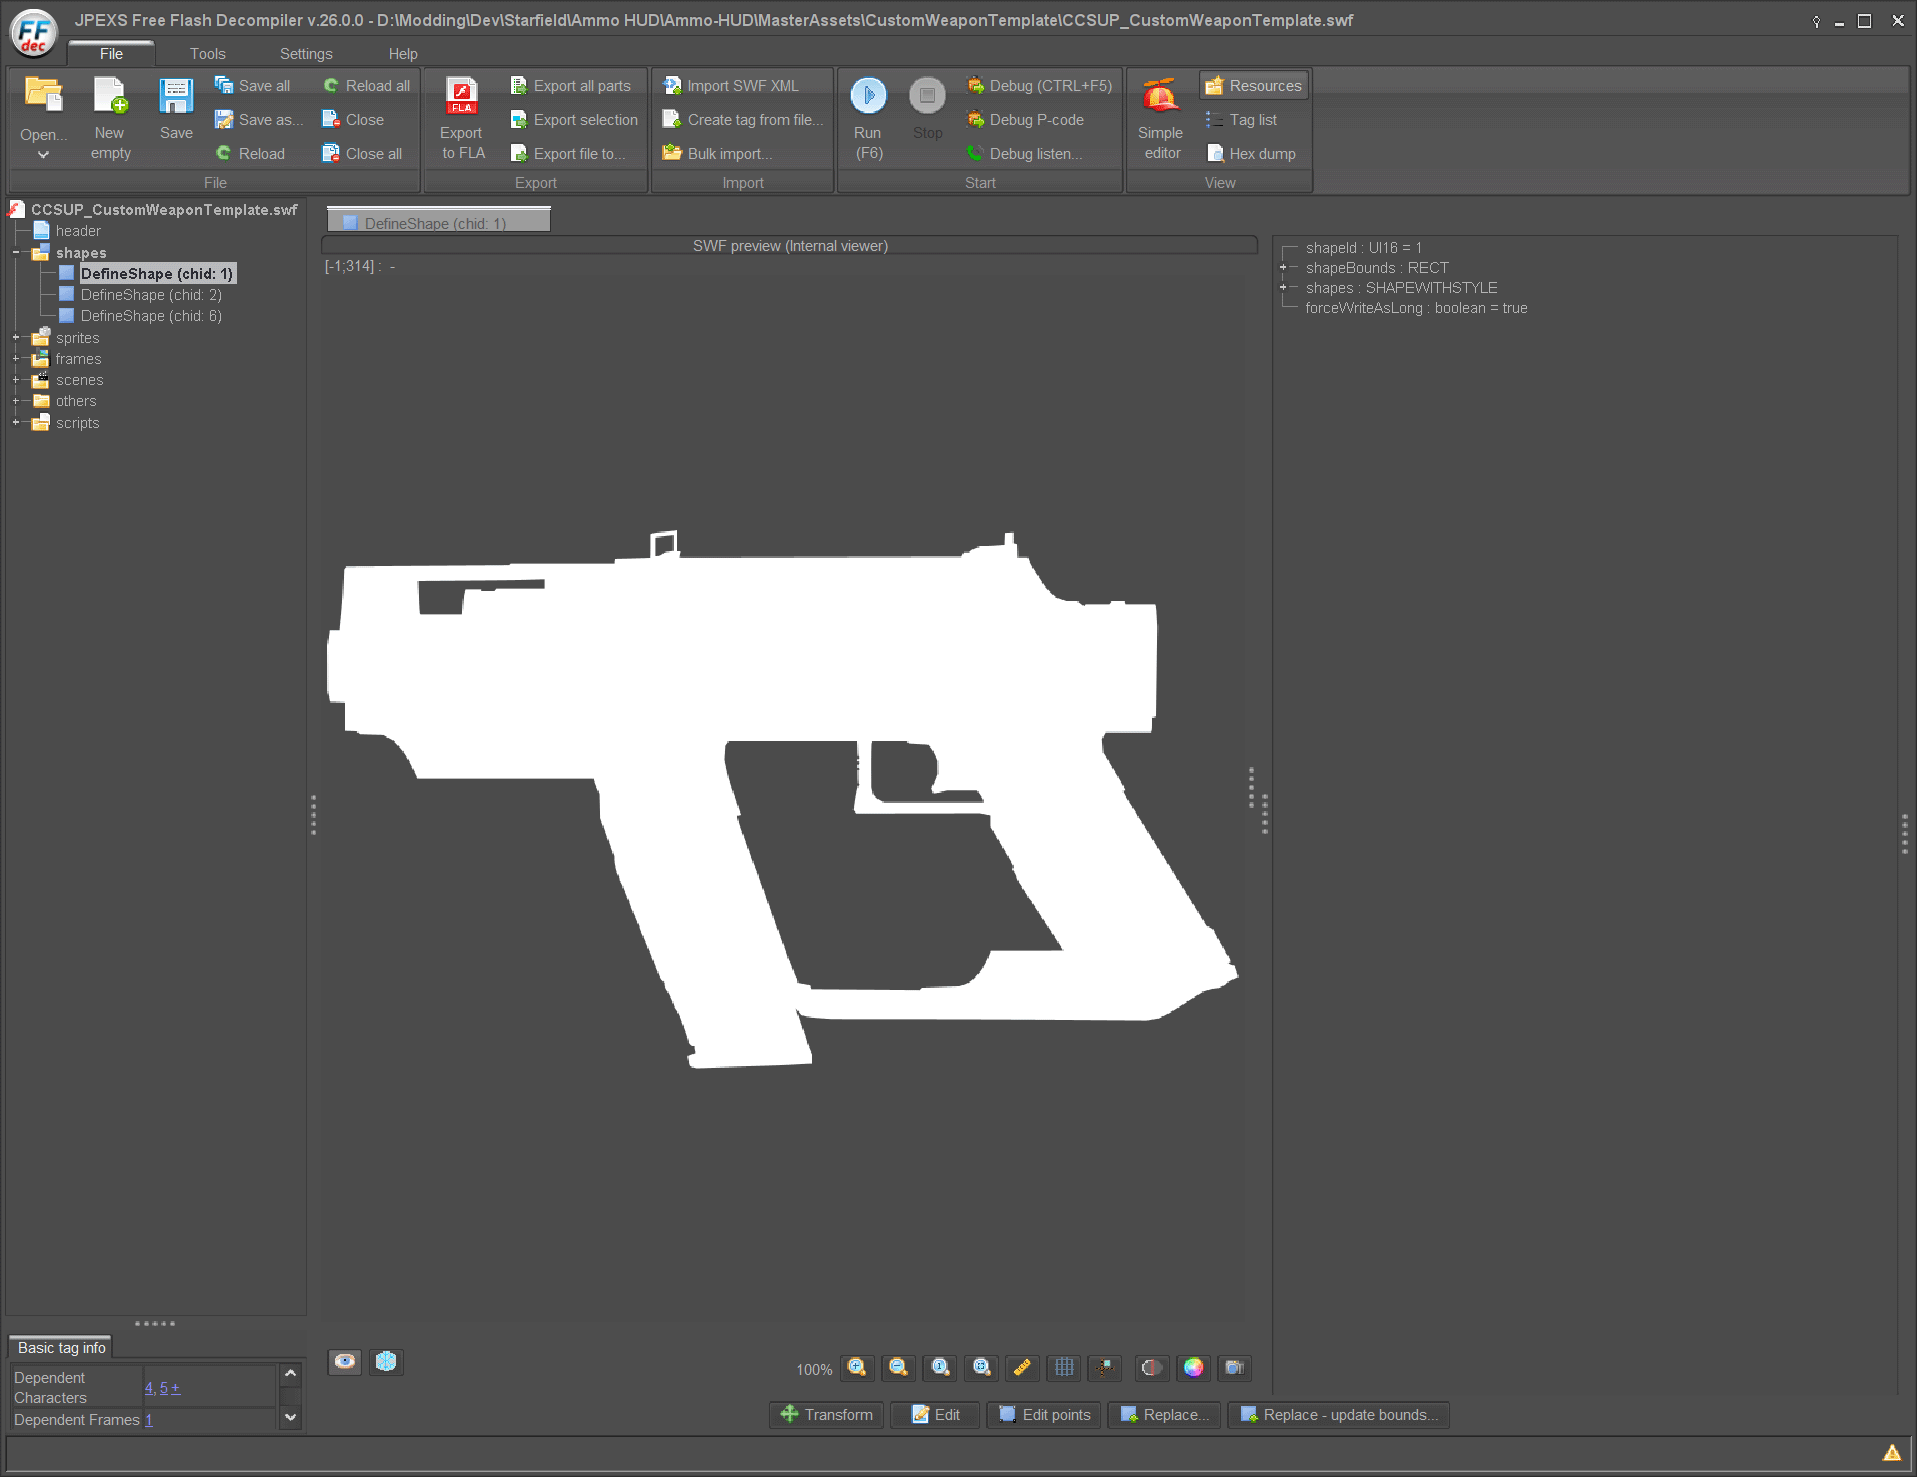
Imported Icon
If you click the root on the left side you can see the icon size is larger than the sizing box, this is expected

Icon size is expected to be larger than the sizing box
Setting your Linkage Name
This section explains how to make the Weapon Icon Template use your weapons Linkage Name so that Starfield will understand what icon to load.
Changing the Symbol Class Name
On the left side expand others then click on SymbolClass, on the bottom click Edit
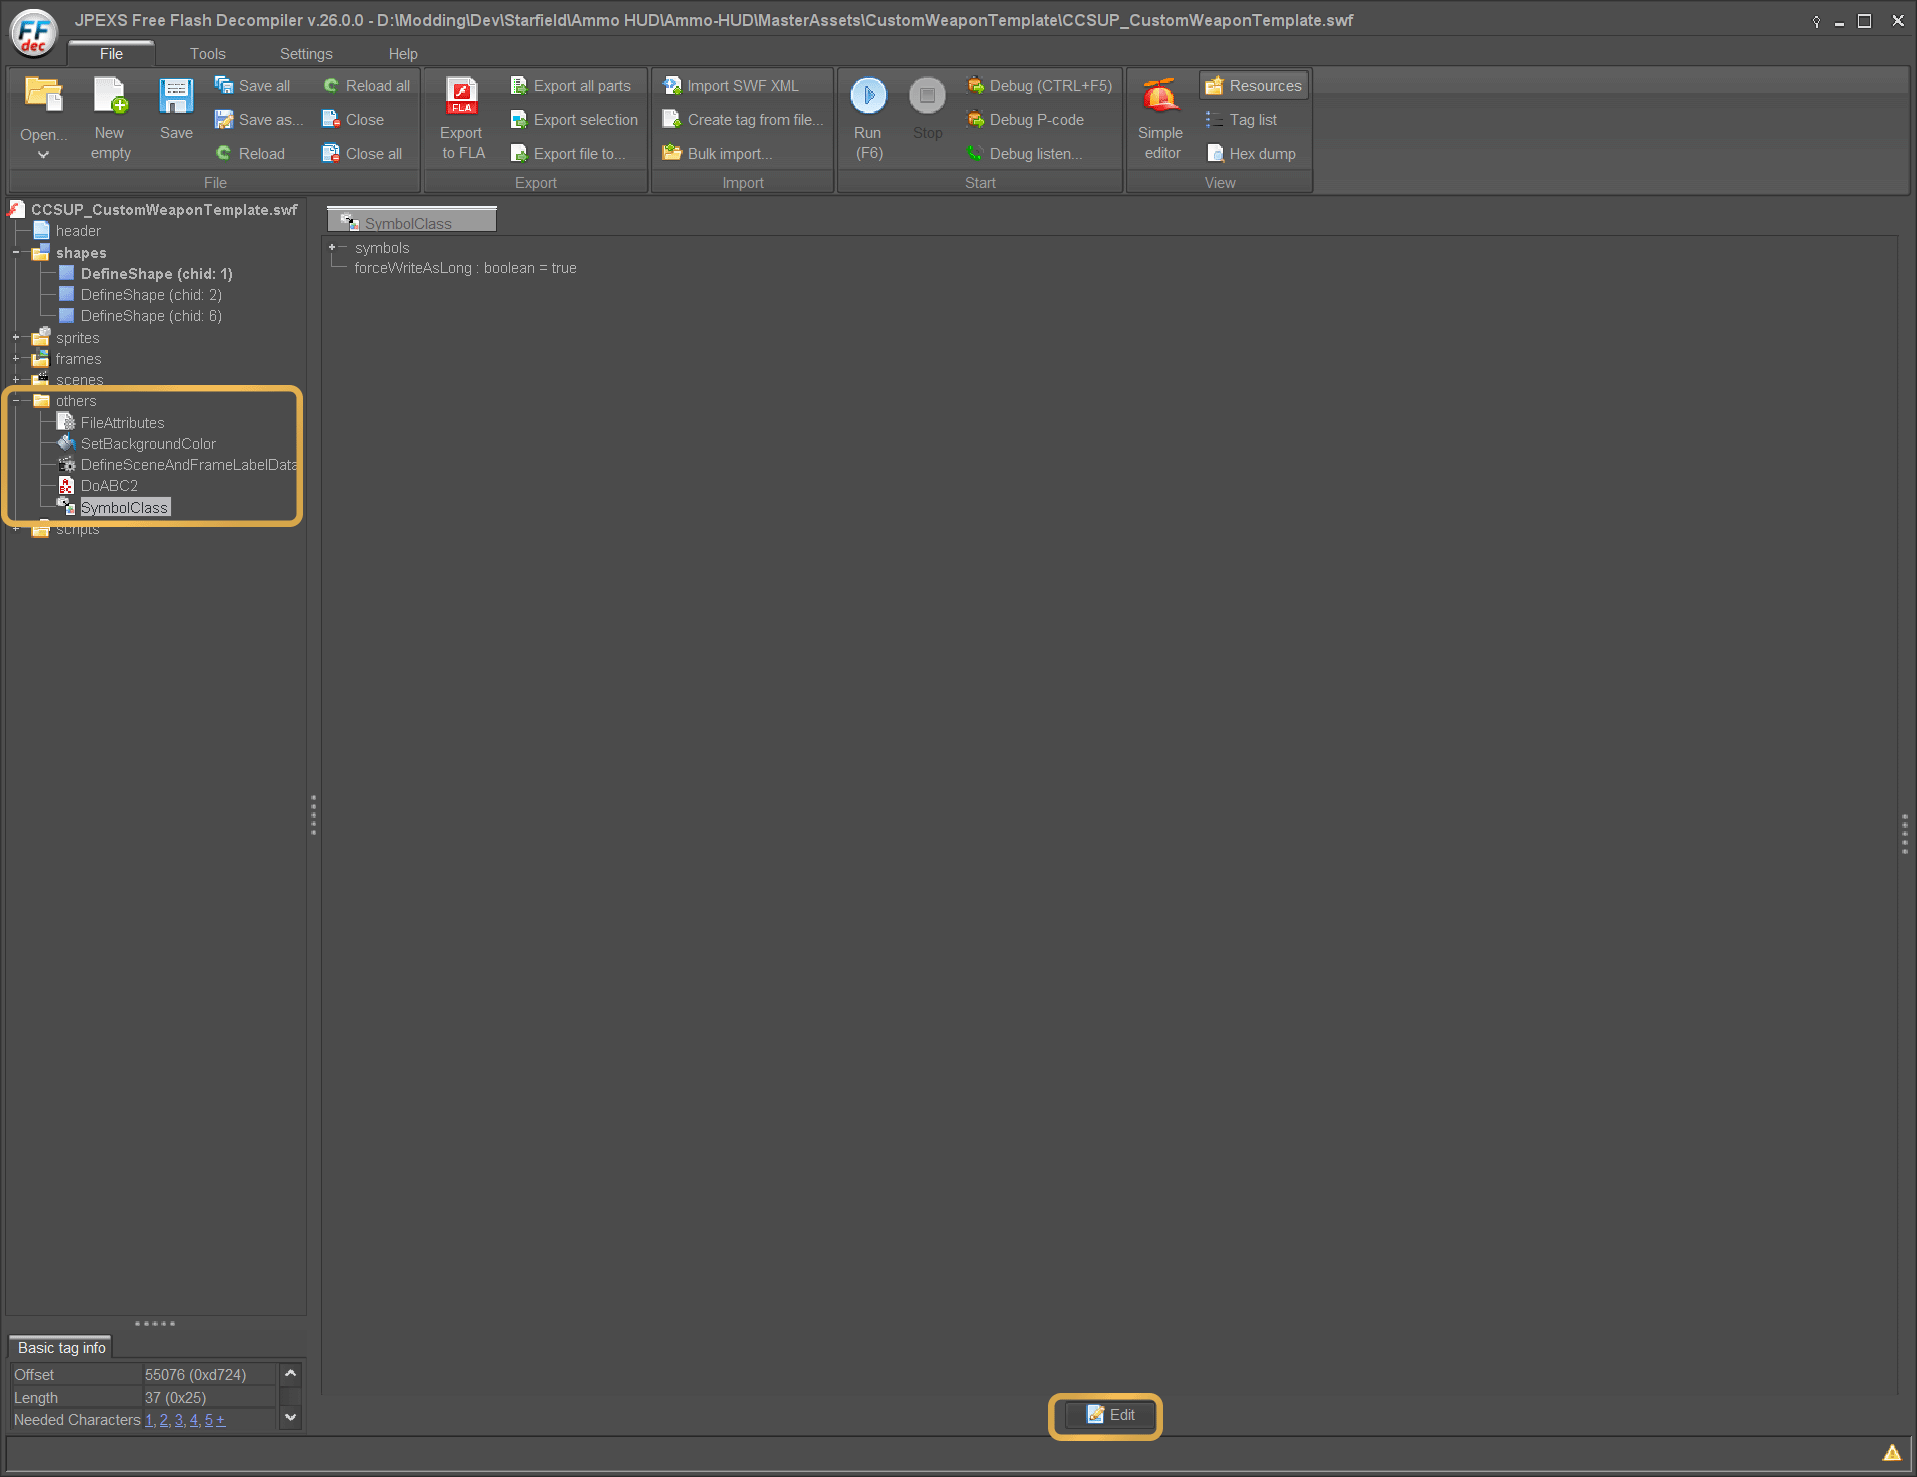
Changing the Symbol Class Name
On the panel above the Edit button expand Symbols and click on tag[0], next to String = replace CCSUP_CustomWeaponTemplate with your weapons UI_Icon keywords linkage name (for this tutorial im using CCSUP_MyWeaponLinkageName) and then click Save on the bottom.
DO NOT change the number on the left, it MUST stay 5
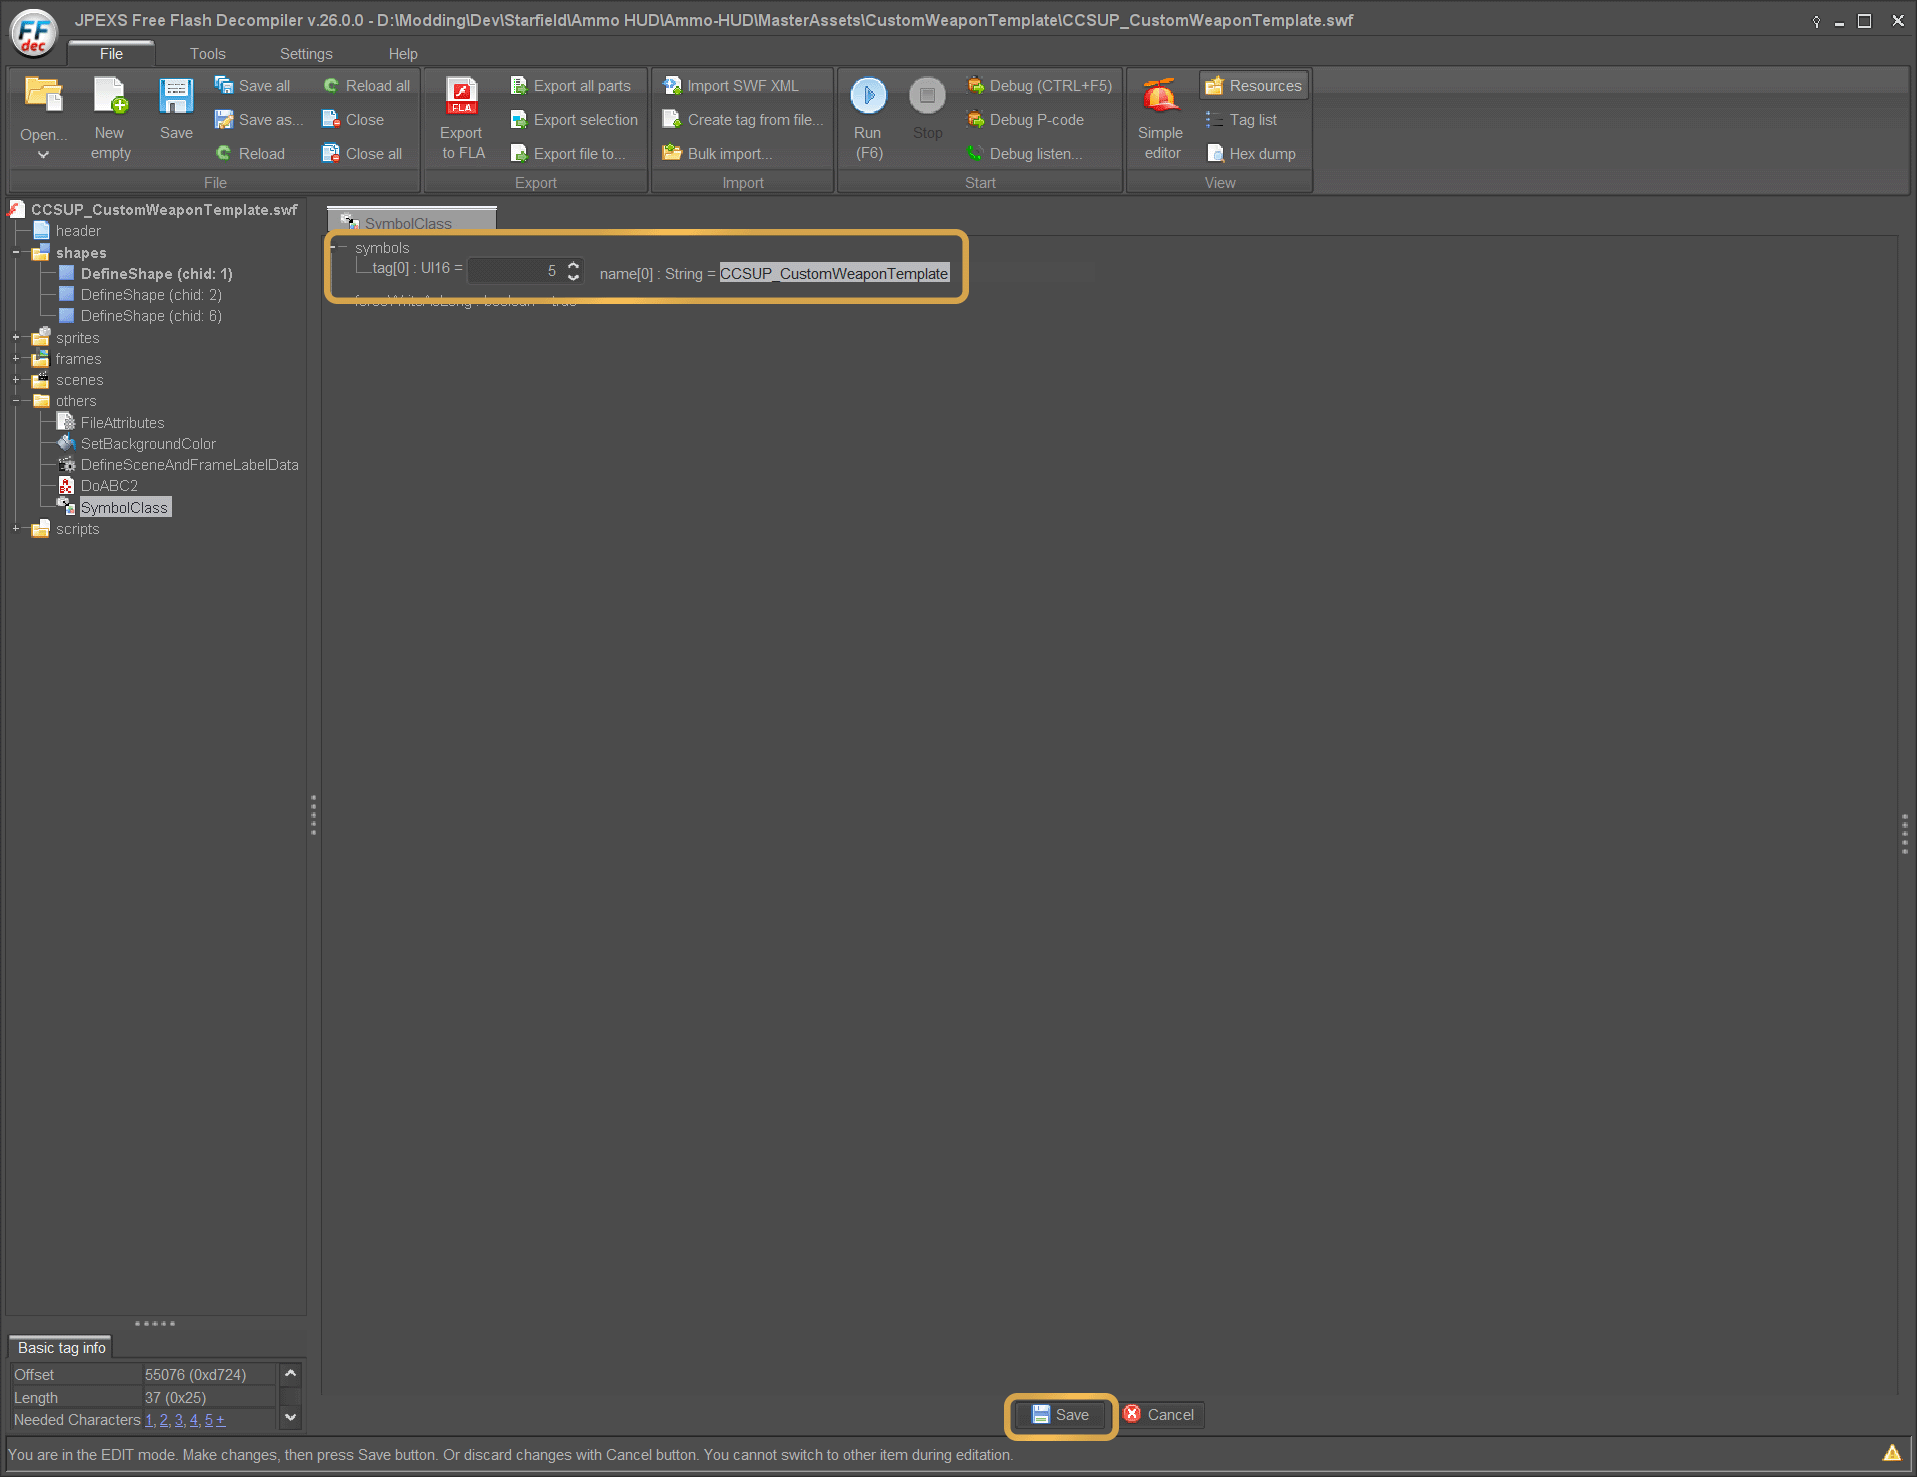
Set the linkage name symbol value

Changed linkage name symbol value
Changing the Script Class Name
On the left side expand scripts then <default package> and select CCSUP_CustomWeaponTemplate, then click Edit Action Script on the bottom
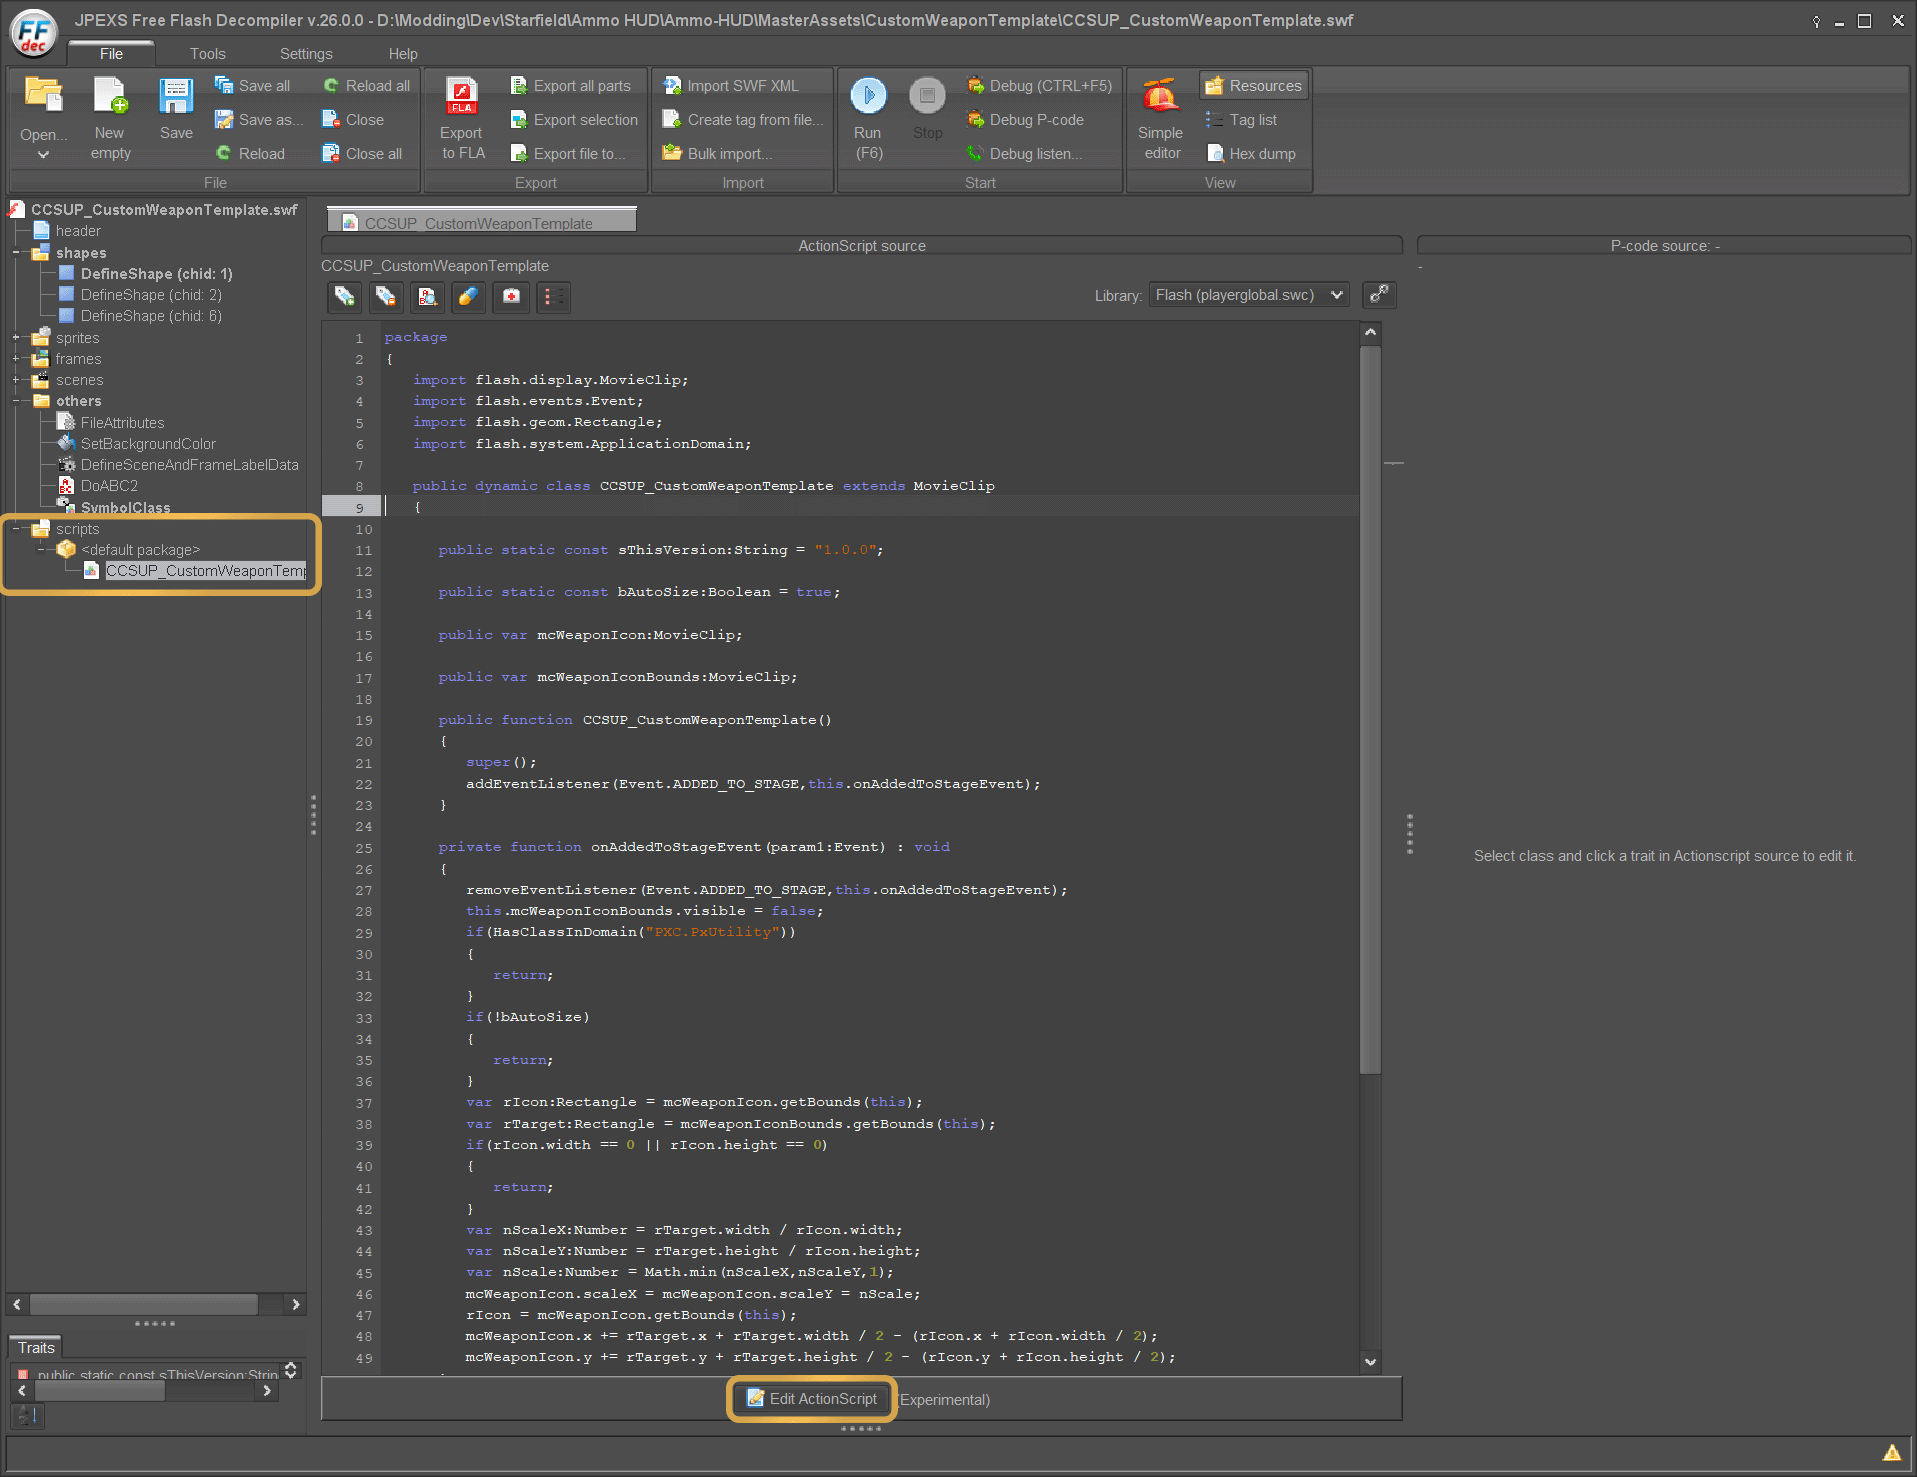
Opening the script
Replace CCSUP_CustomWeaponTemplate with your linkage name in these two spots (for this tutorial im using CCSUP_MyWeaponLinkageName), then click Save
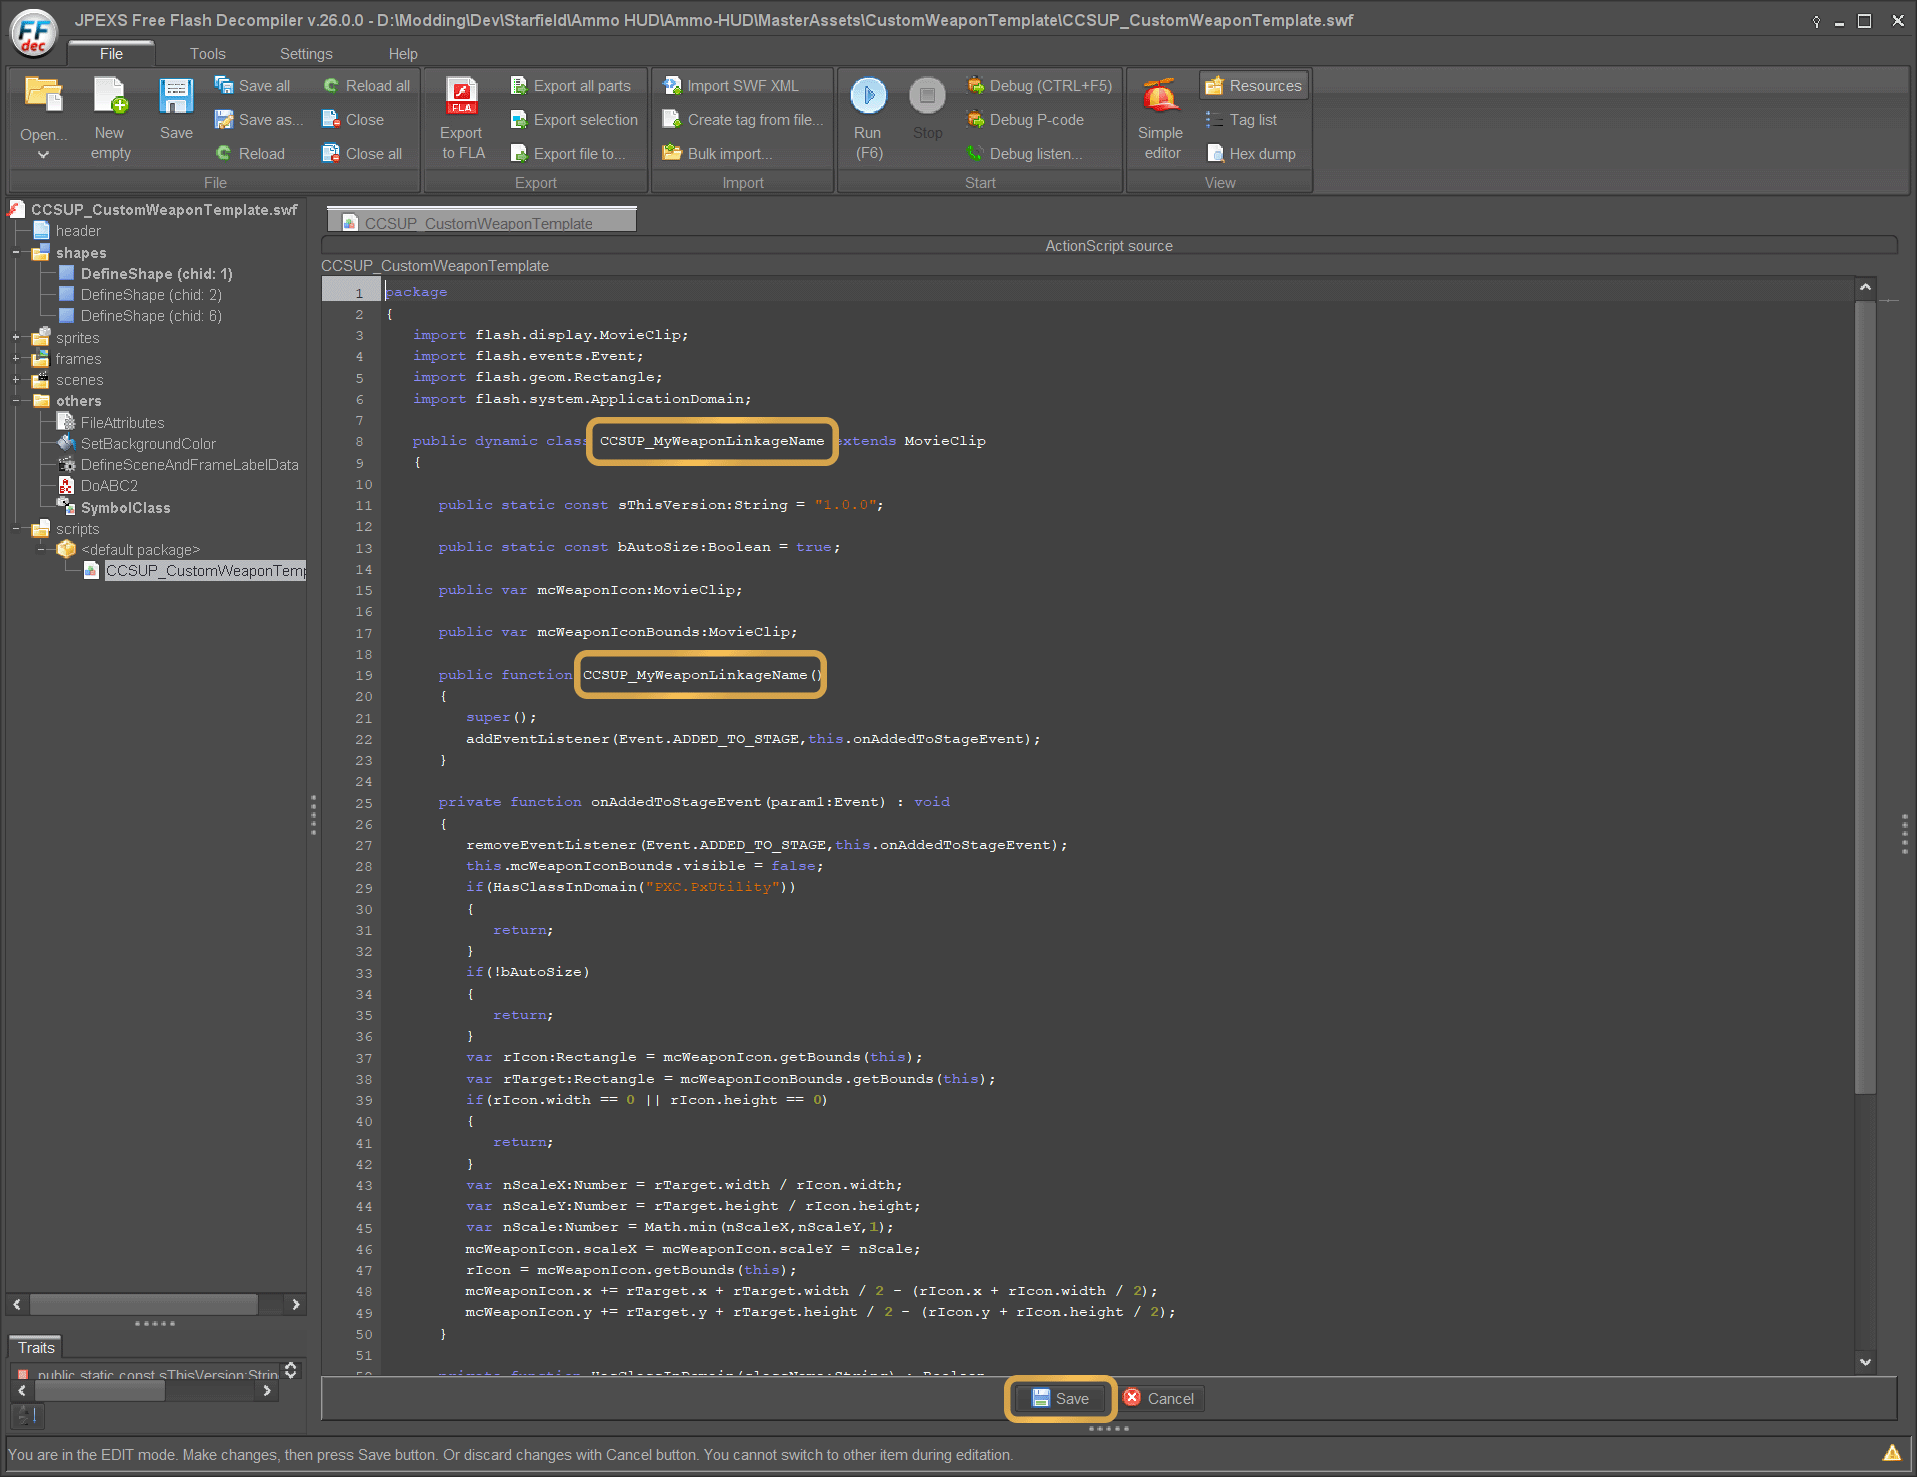
Replace CCSUP_CustomWeaponTemplate in two spots
Saving the file
In this tutorial I am going to show the Save As... feature, you can also just copy the template file and rename it before starting this process so you dont have to worry about overriding the template.
Save As
On the top left, choose Save as... then navigate to where you want to save it, enter your linkage name (for this tutorial im using CCSUP_MyWeaponLinkageName) and then click Save
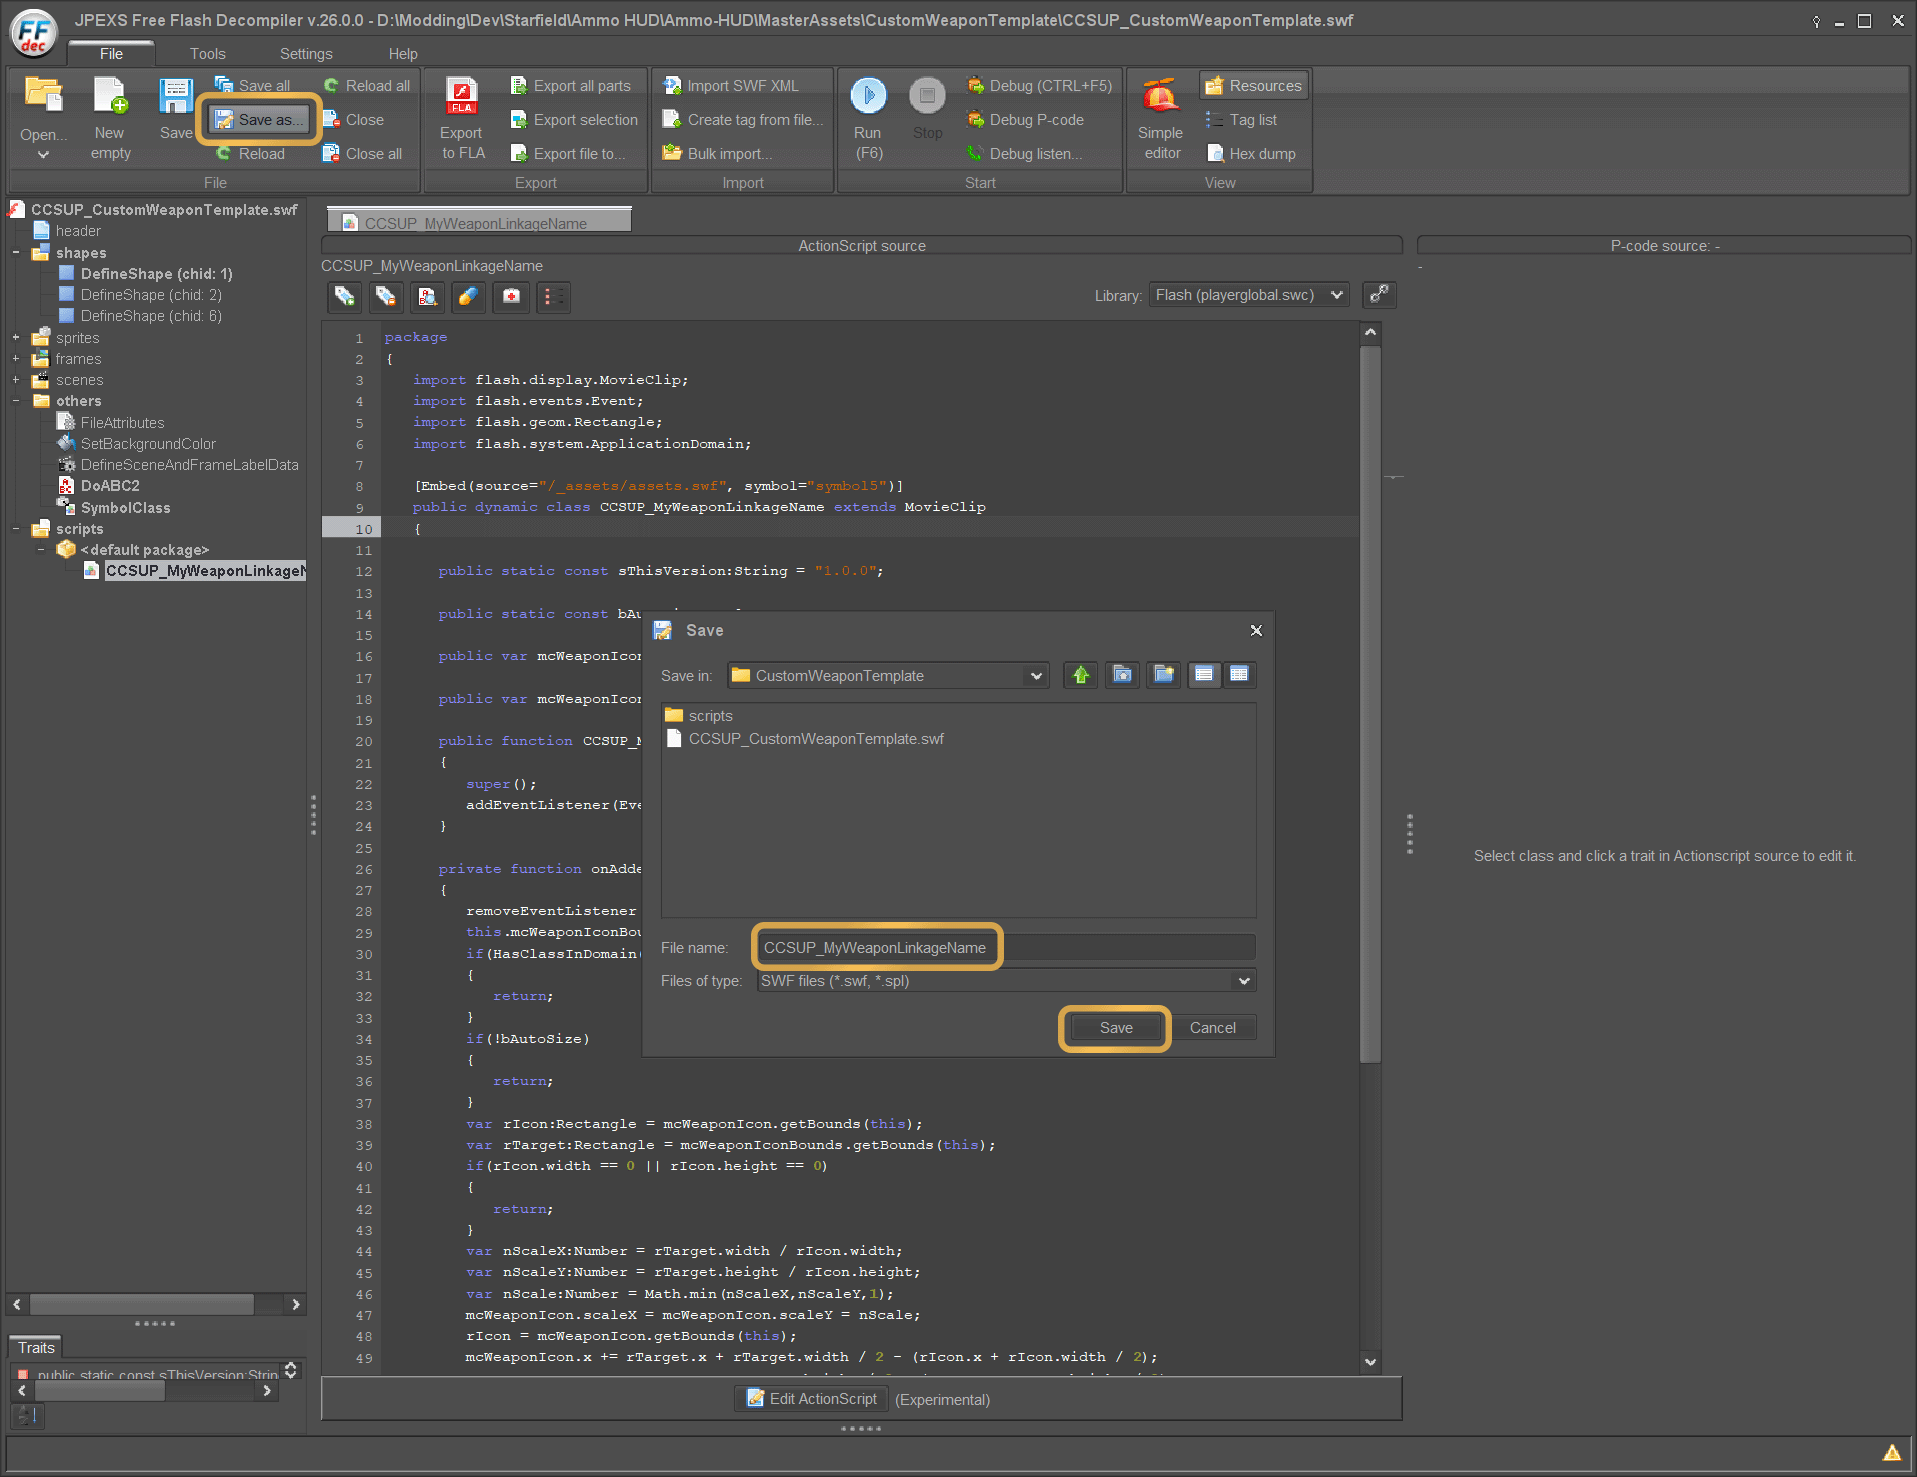
Save the file
Finished
Thats it! Now you have your Custom Weapon Icon file and you can add it to your mod.
You can find some basic instructions for that here
You will need to repeat all of these steps for every custom weapon in your mod.